Shopify Connection
Connect your Shopify store to sync products, orders, and inventory
Sync products, inventory, and orders between Shopify and Shopfront. When a sale happens on Shopify, items are automatically delisted from your other marketplaces.
Use Client Credentials for new connections. Legacy API tokens were deprecated on 1 January 2026.
Setup
Create a Custom App
- Log in to your Shopify admin at
https://admin.shopify.com/store/{your-store-name}
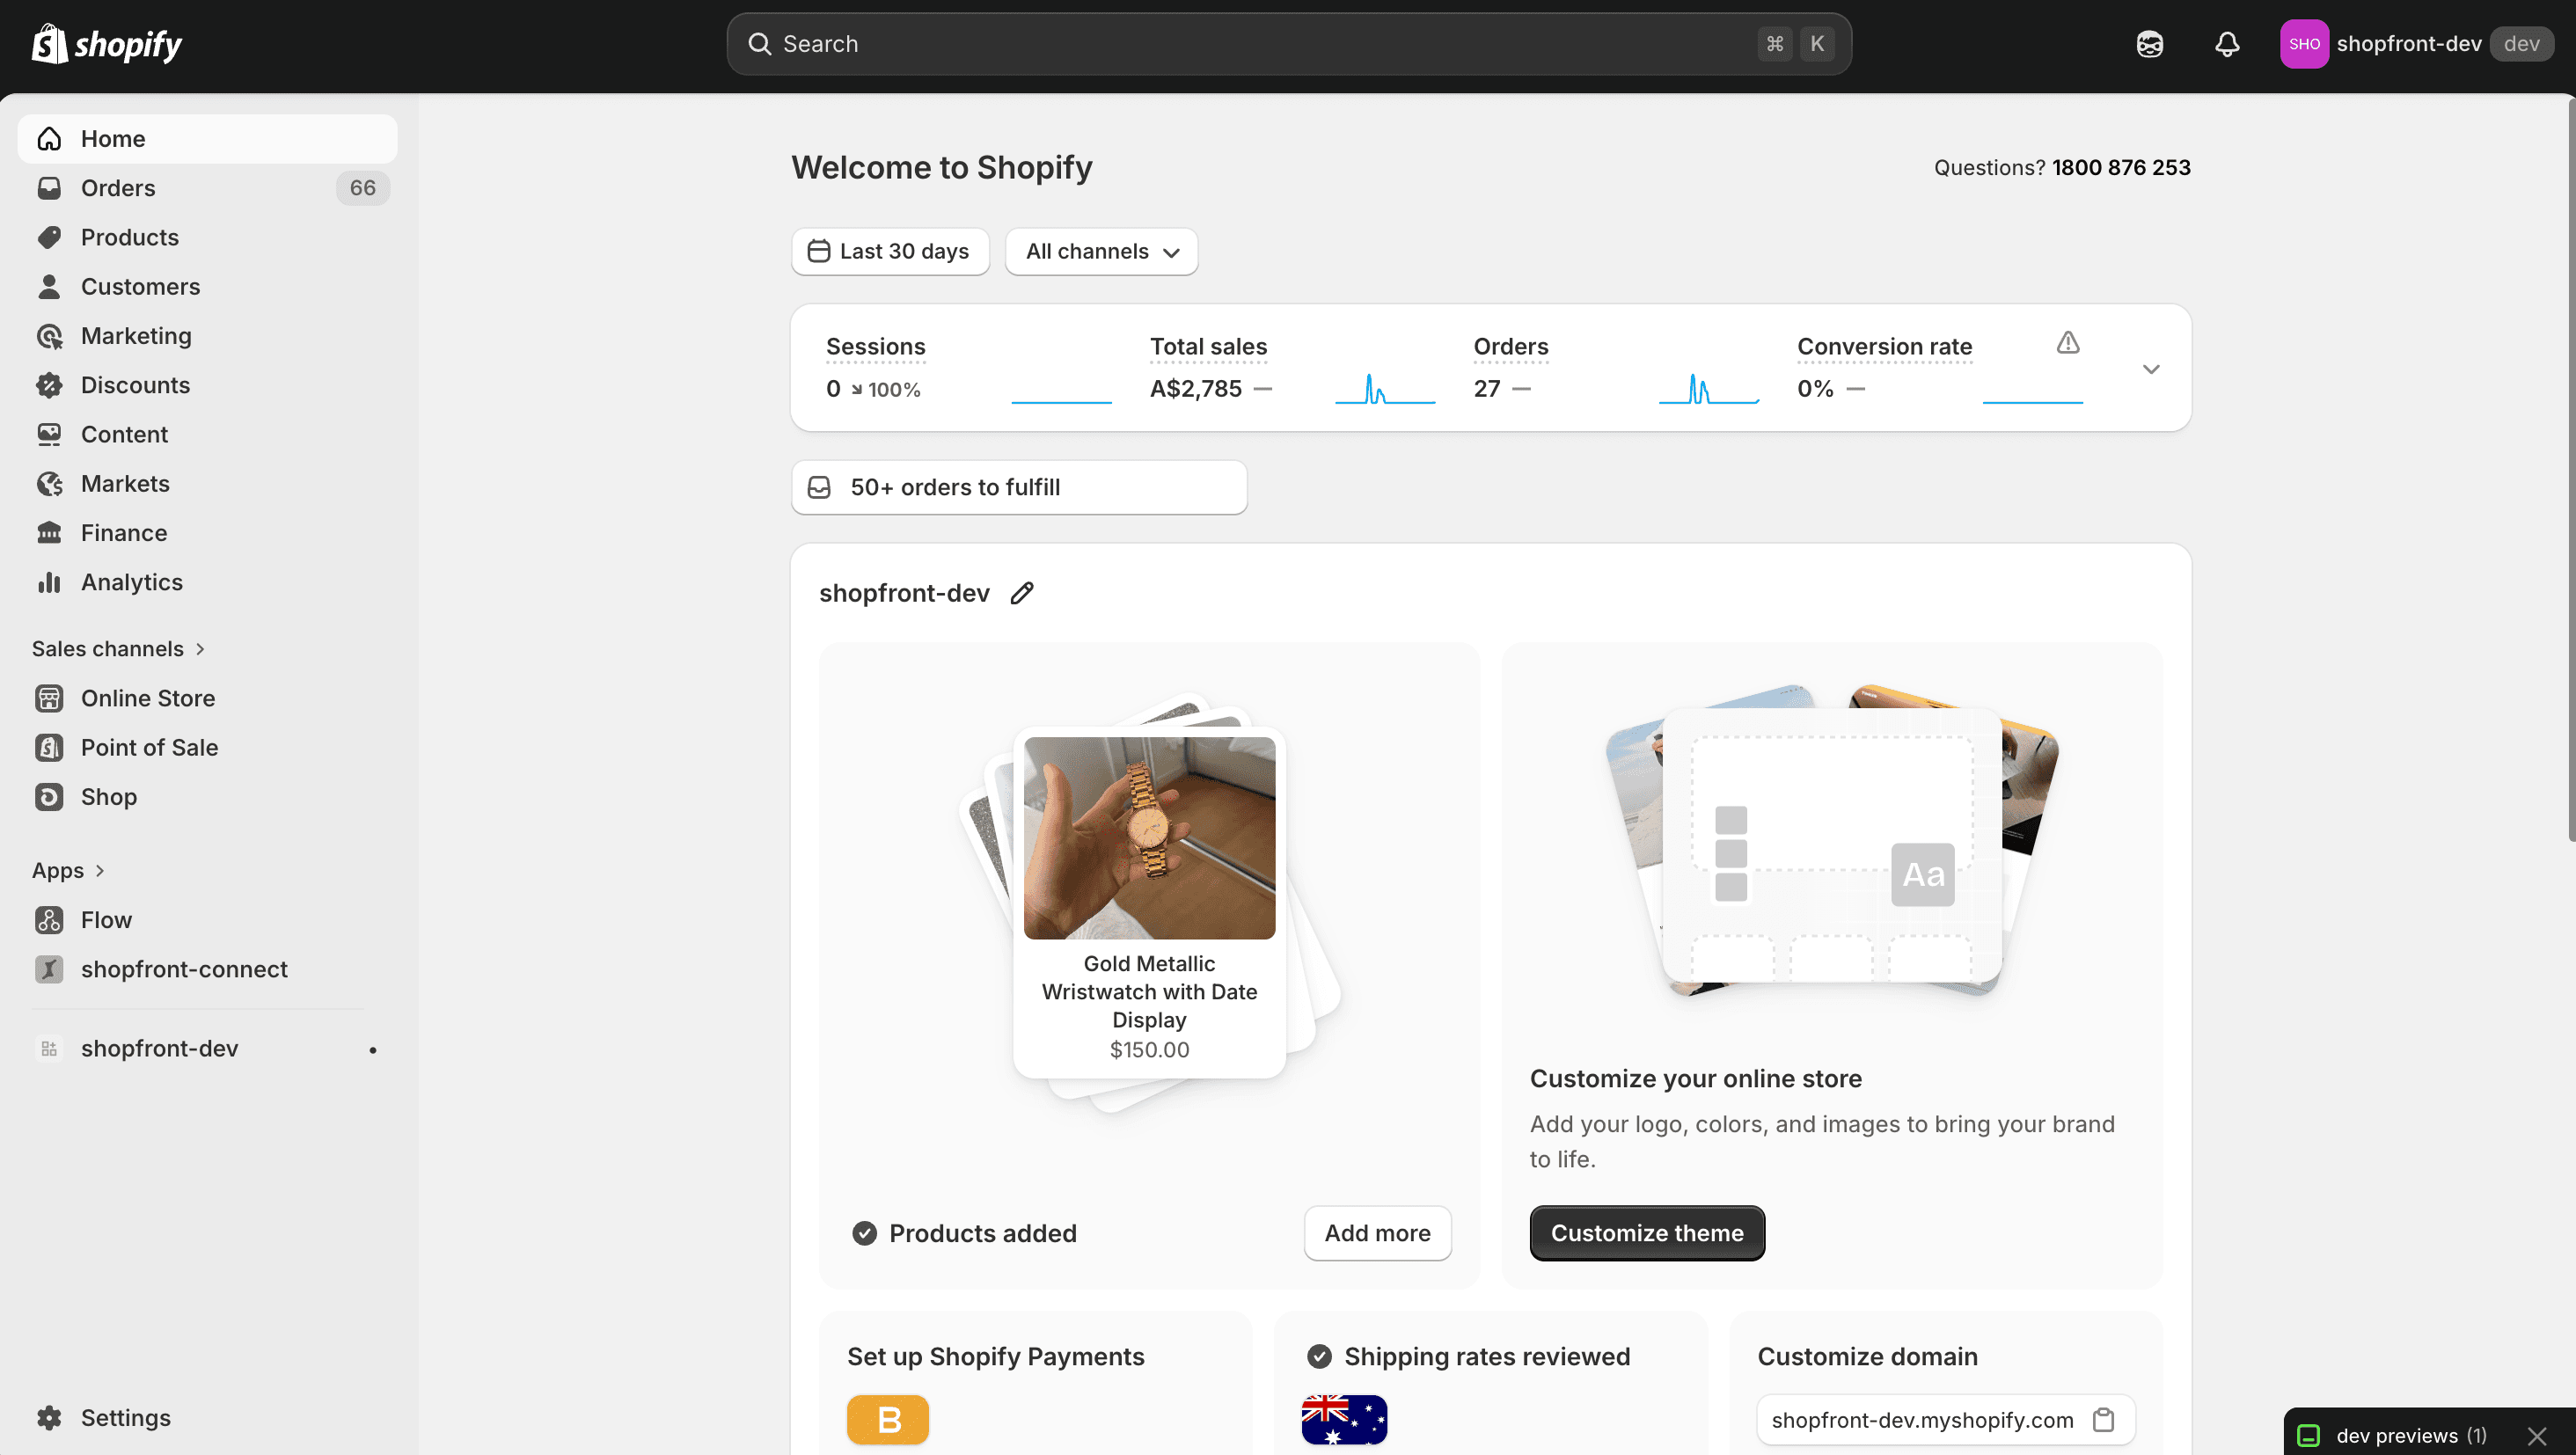
- Click Settings in the bottom-left corner of the sidebar
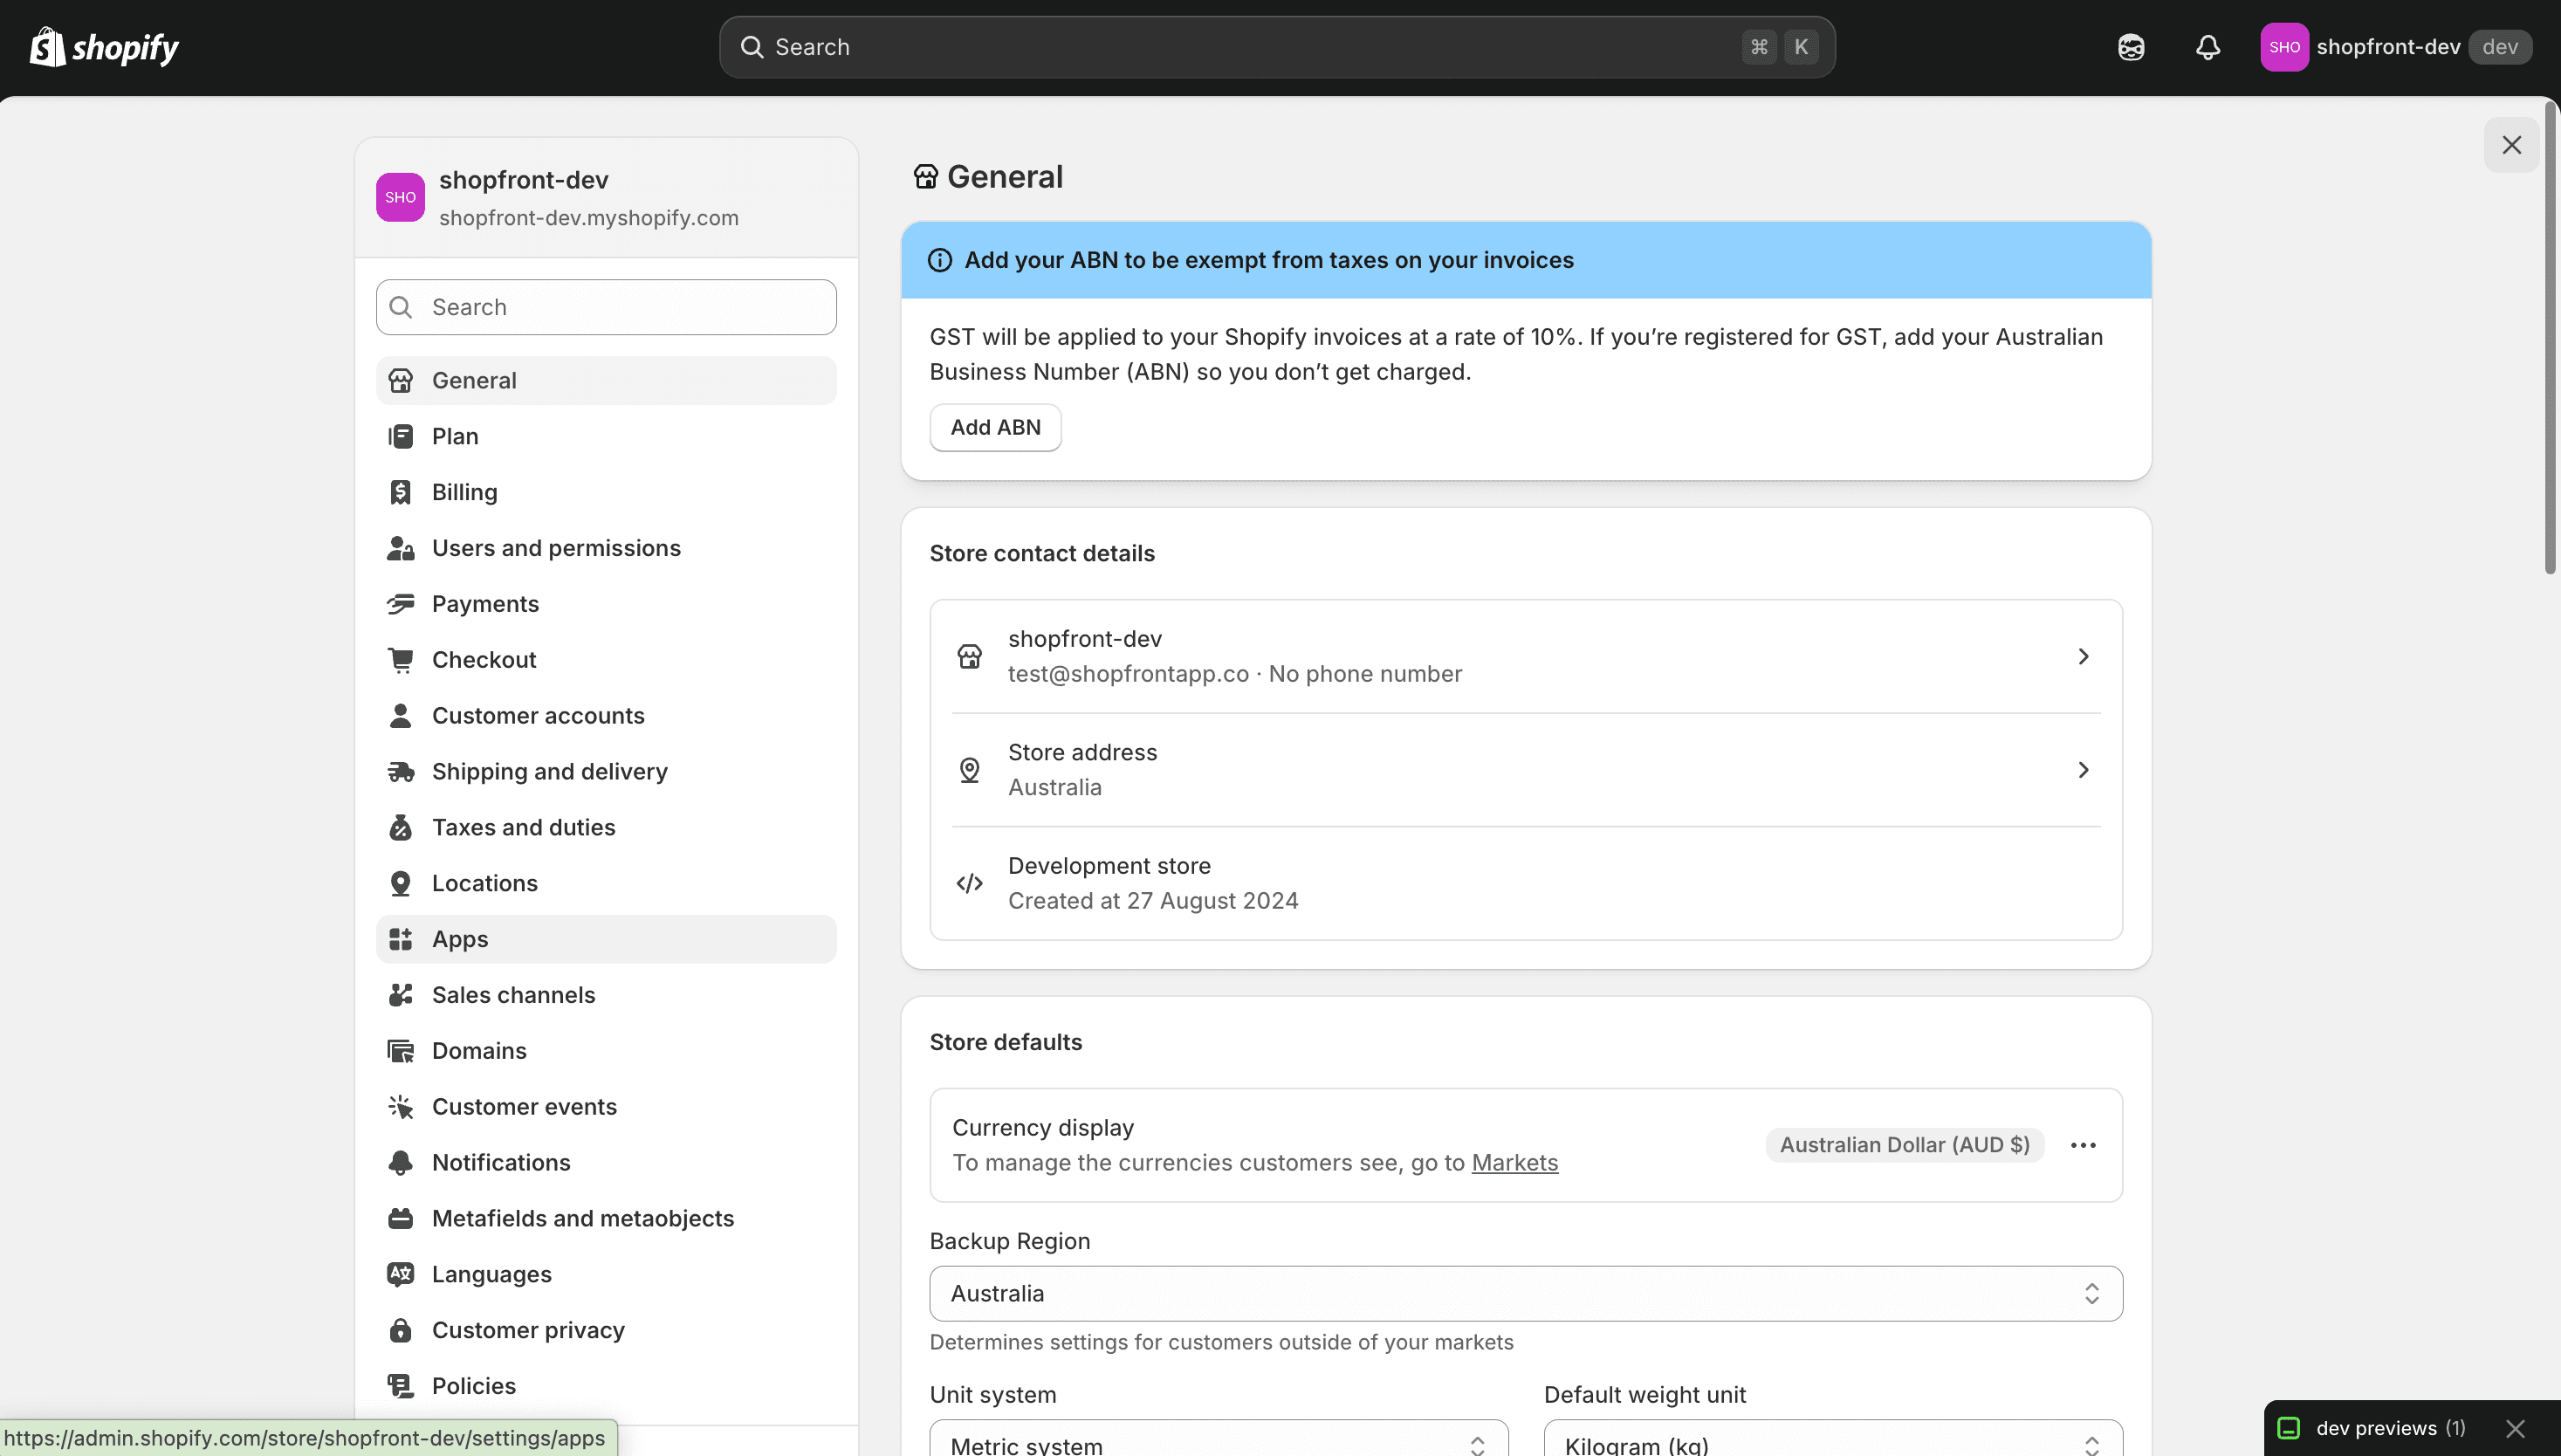
- Click Apps
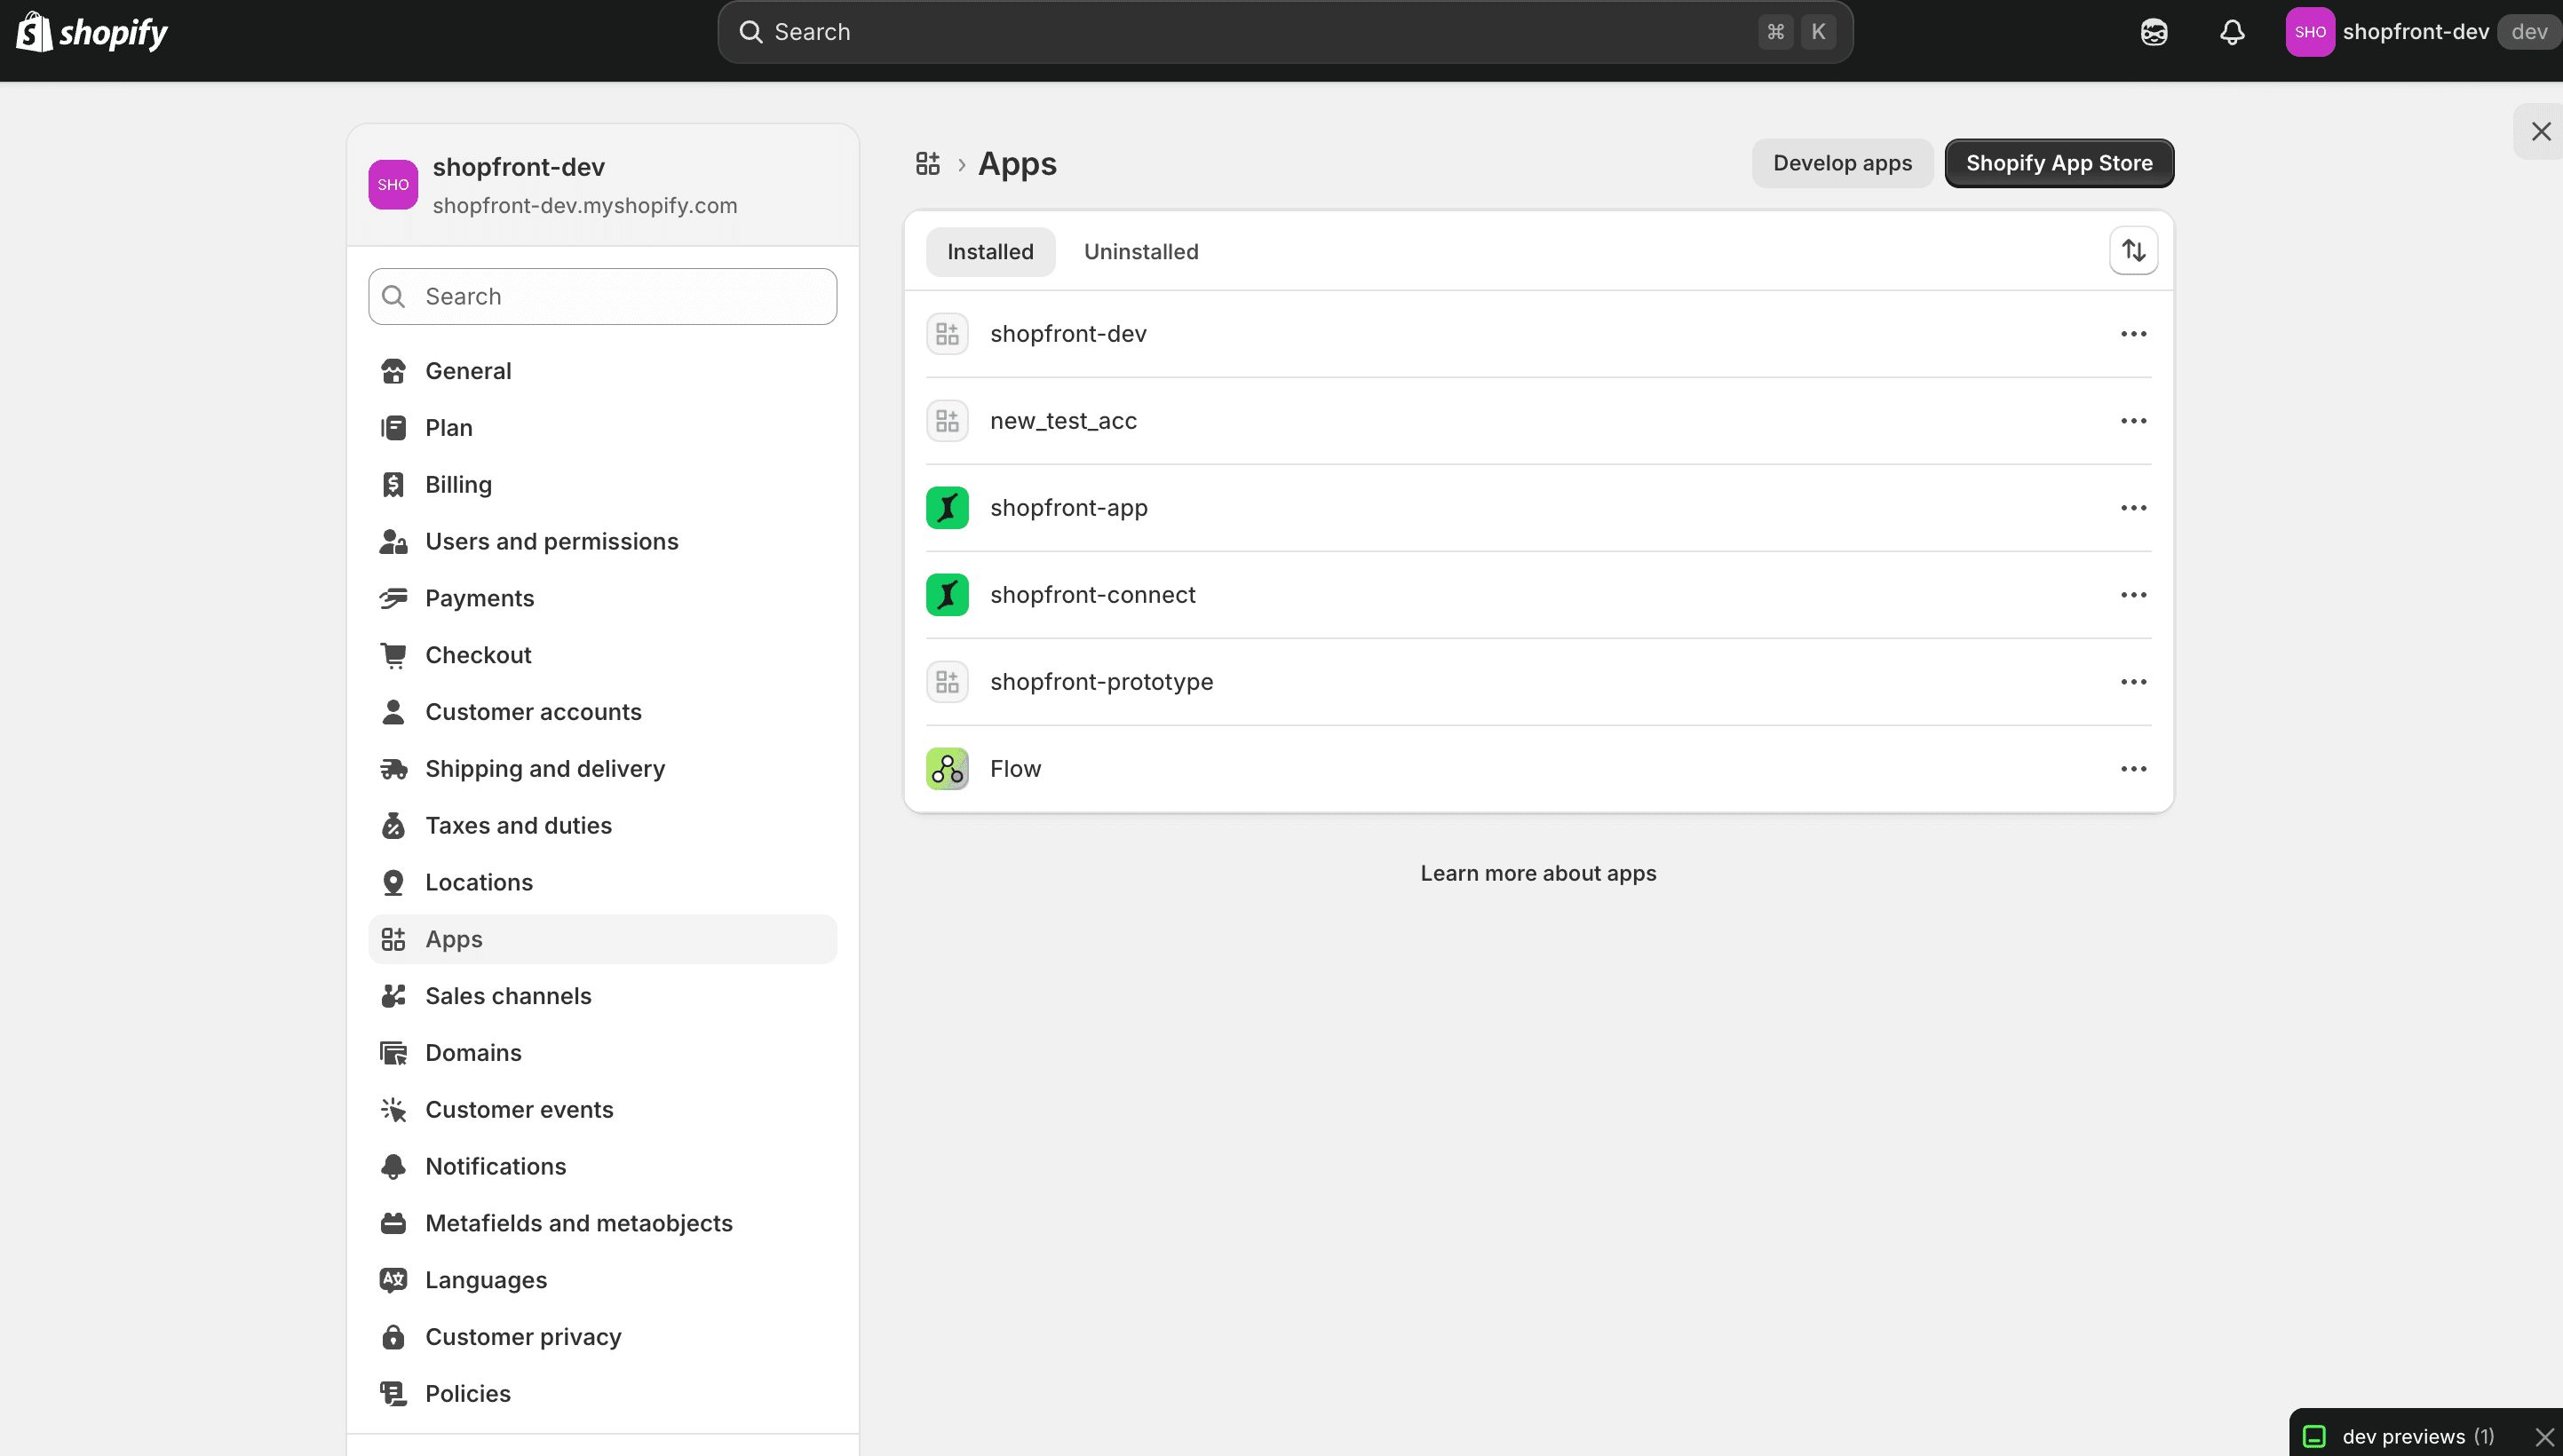
- Click Develop apps in the top-right corner
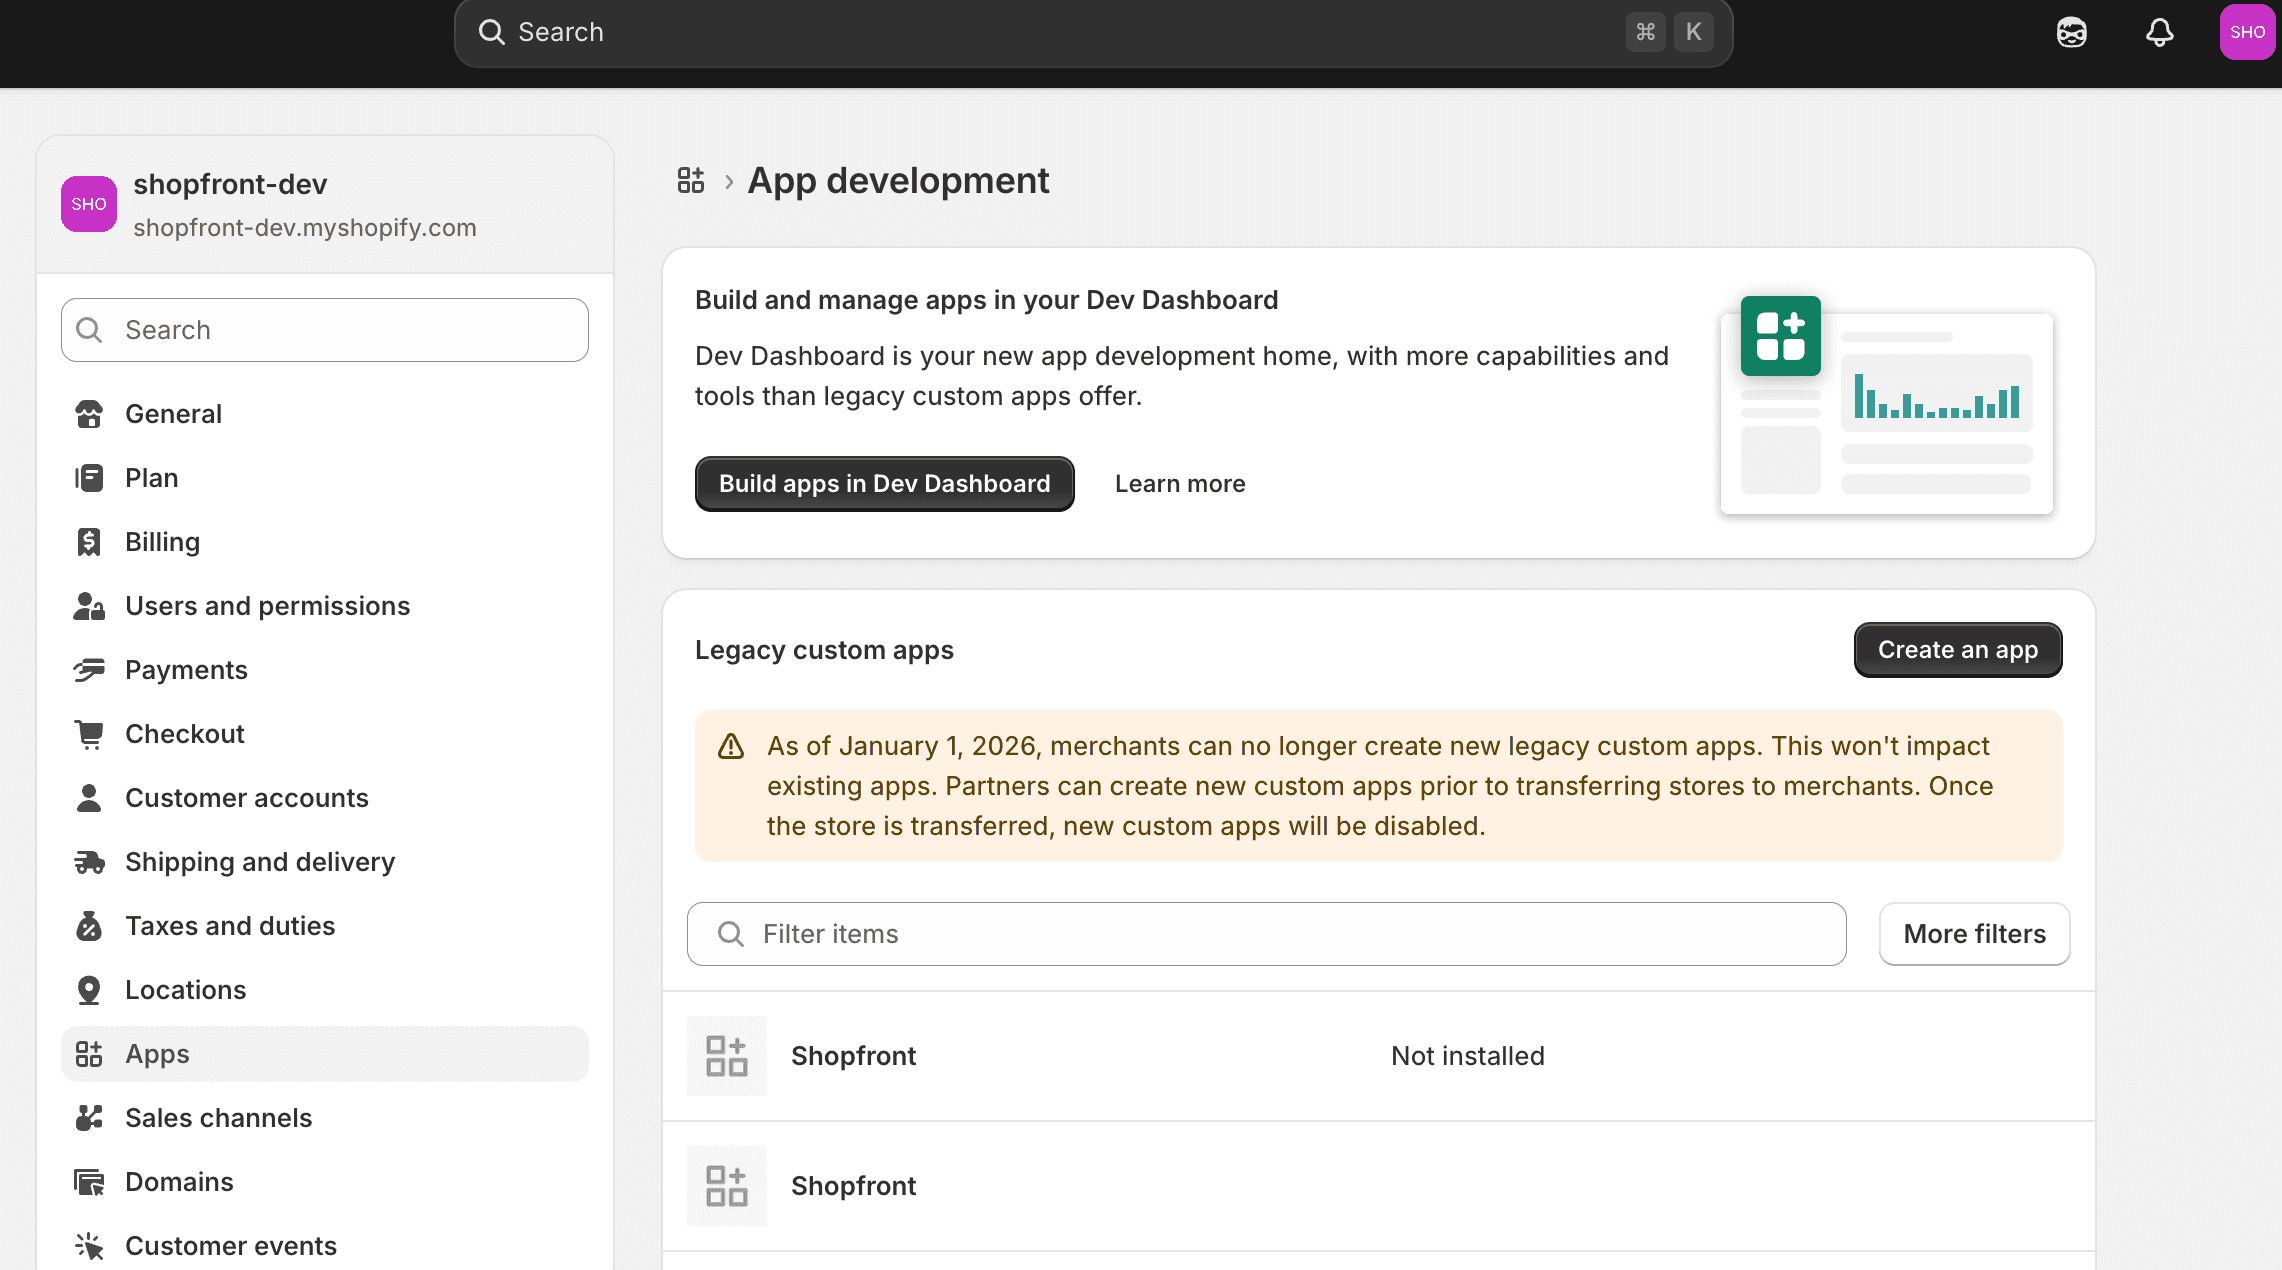
- Click Build apps in Dev Dashboard — this will open a new window

- Click Create app
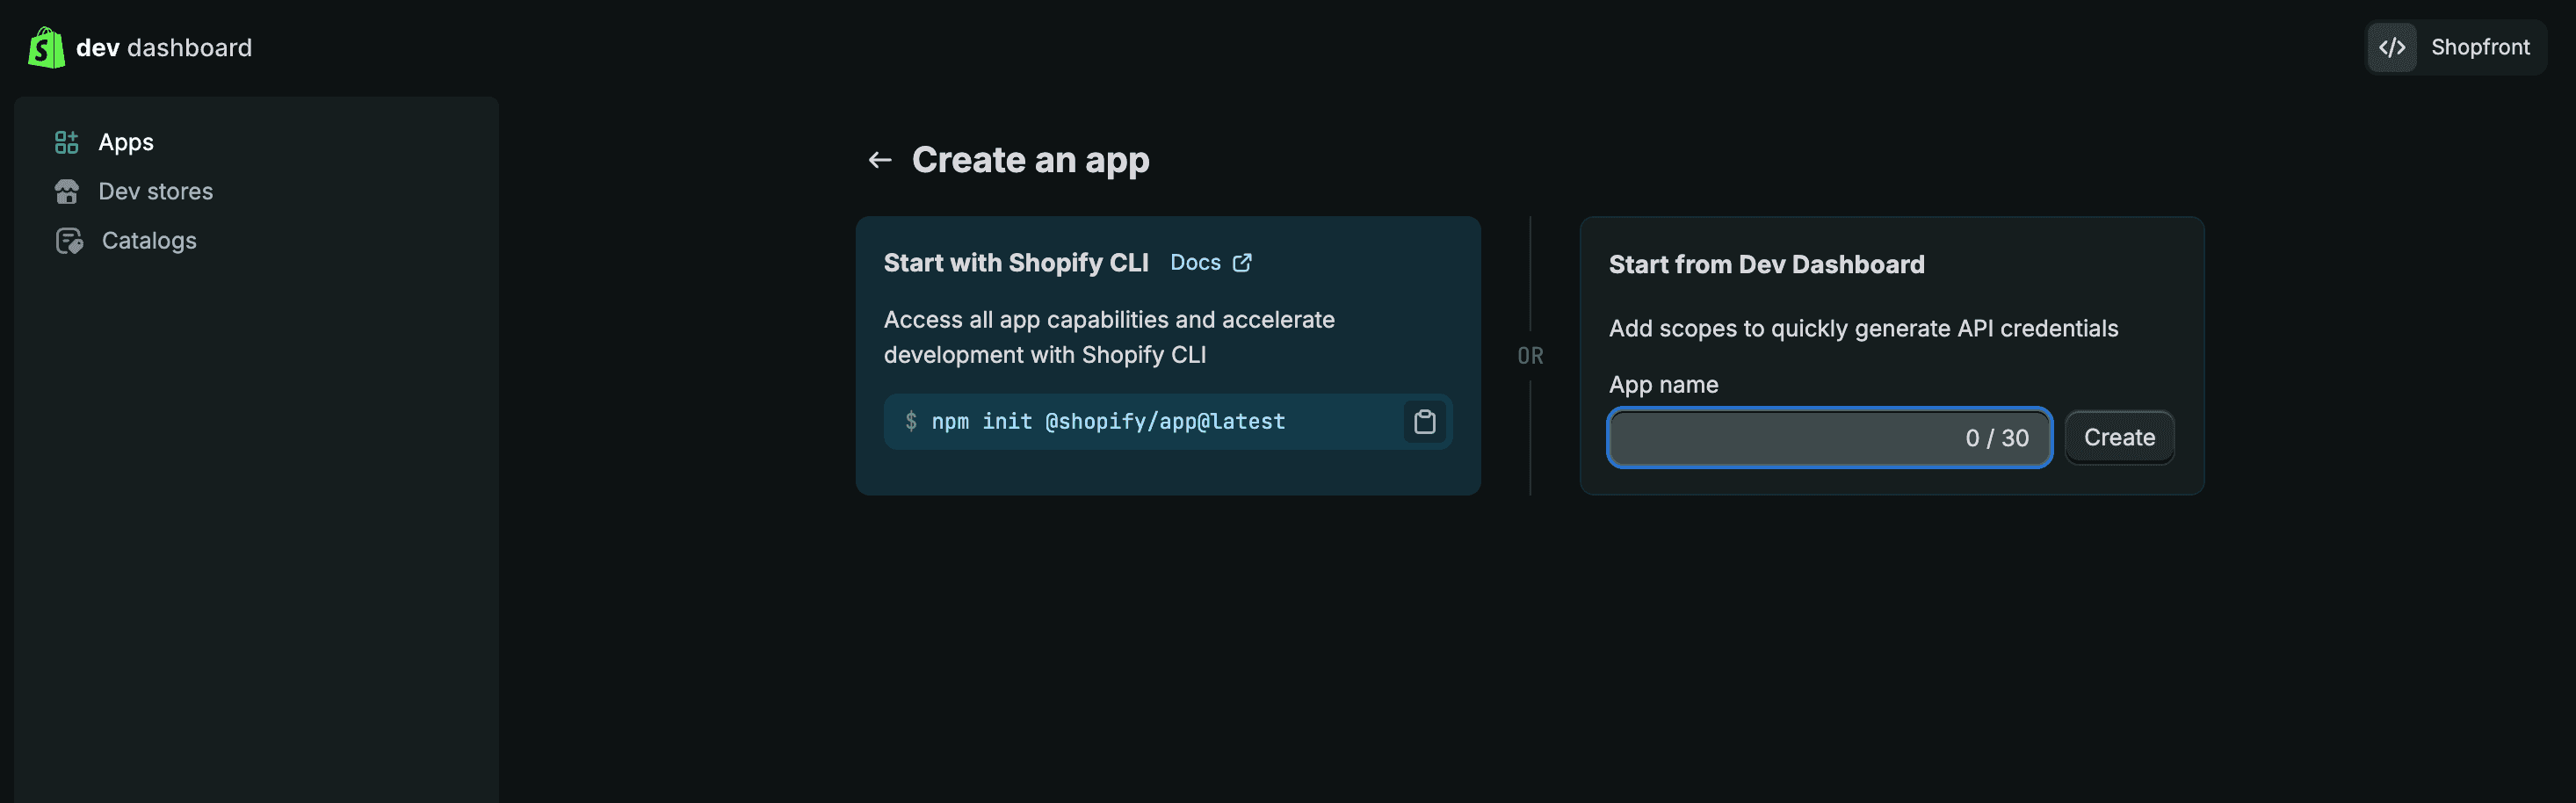
- Under Start from Dev Dashboard, enter "Shopfront" as the app name and click Create — this will open a new window
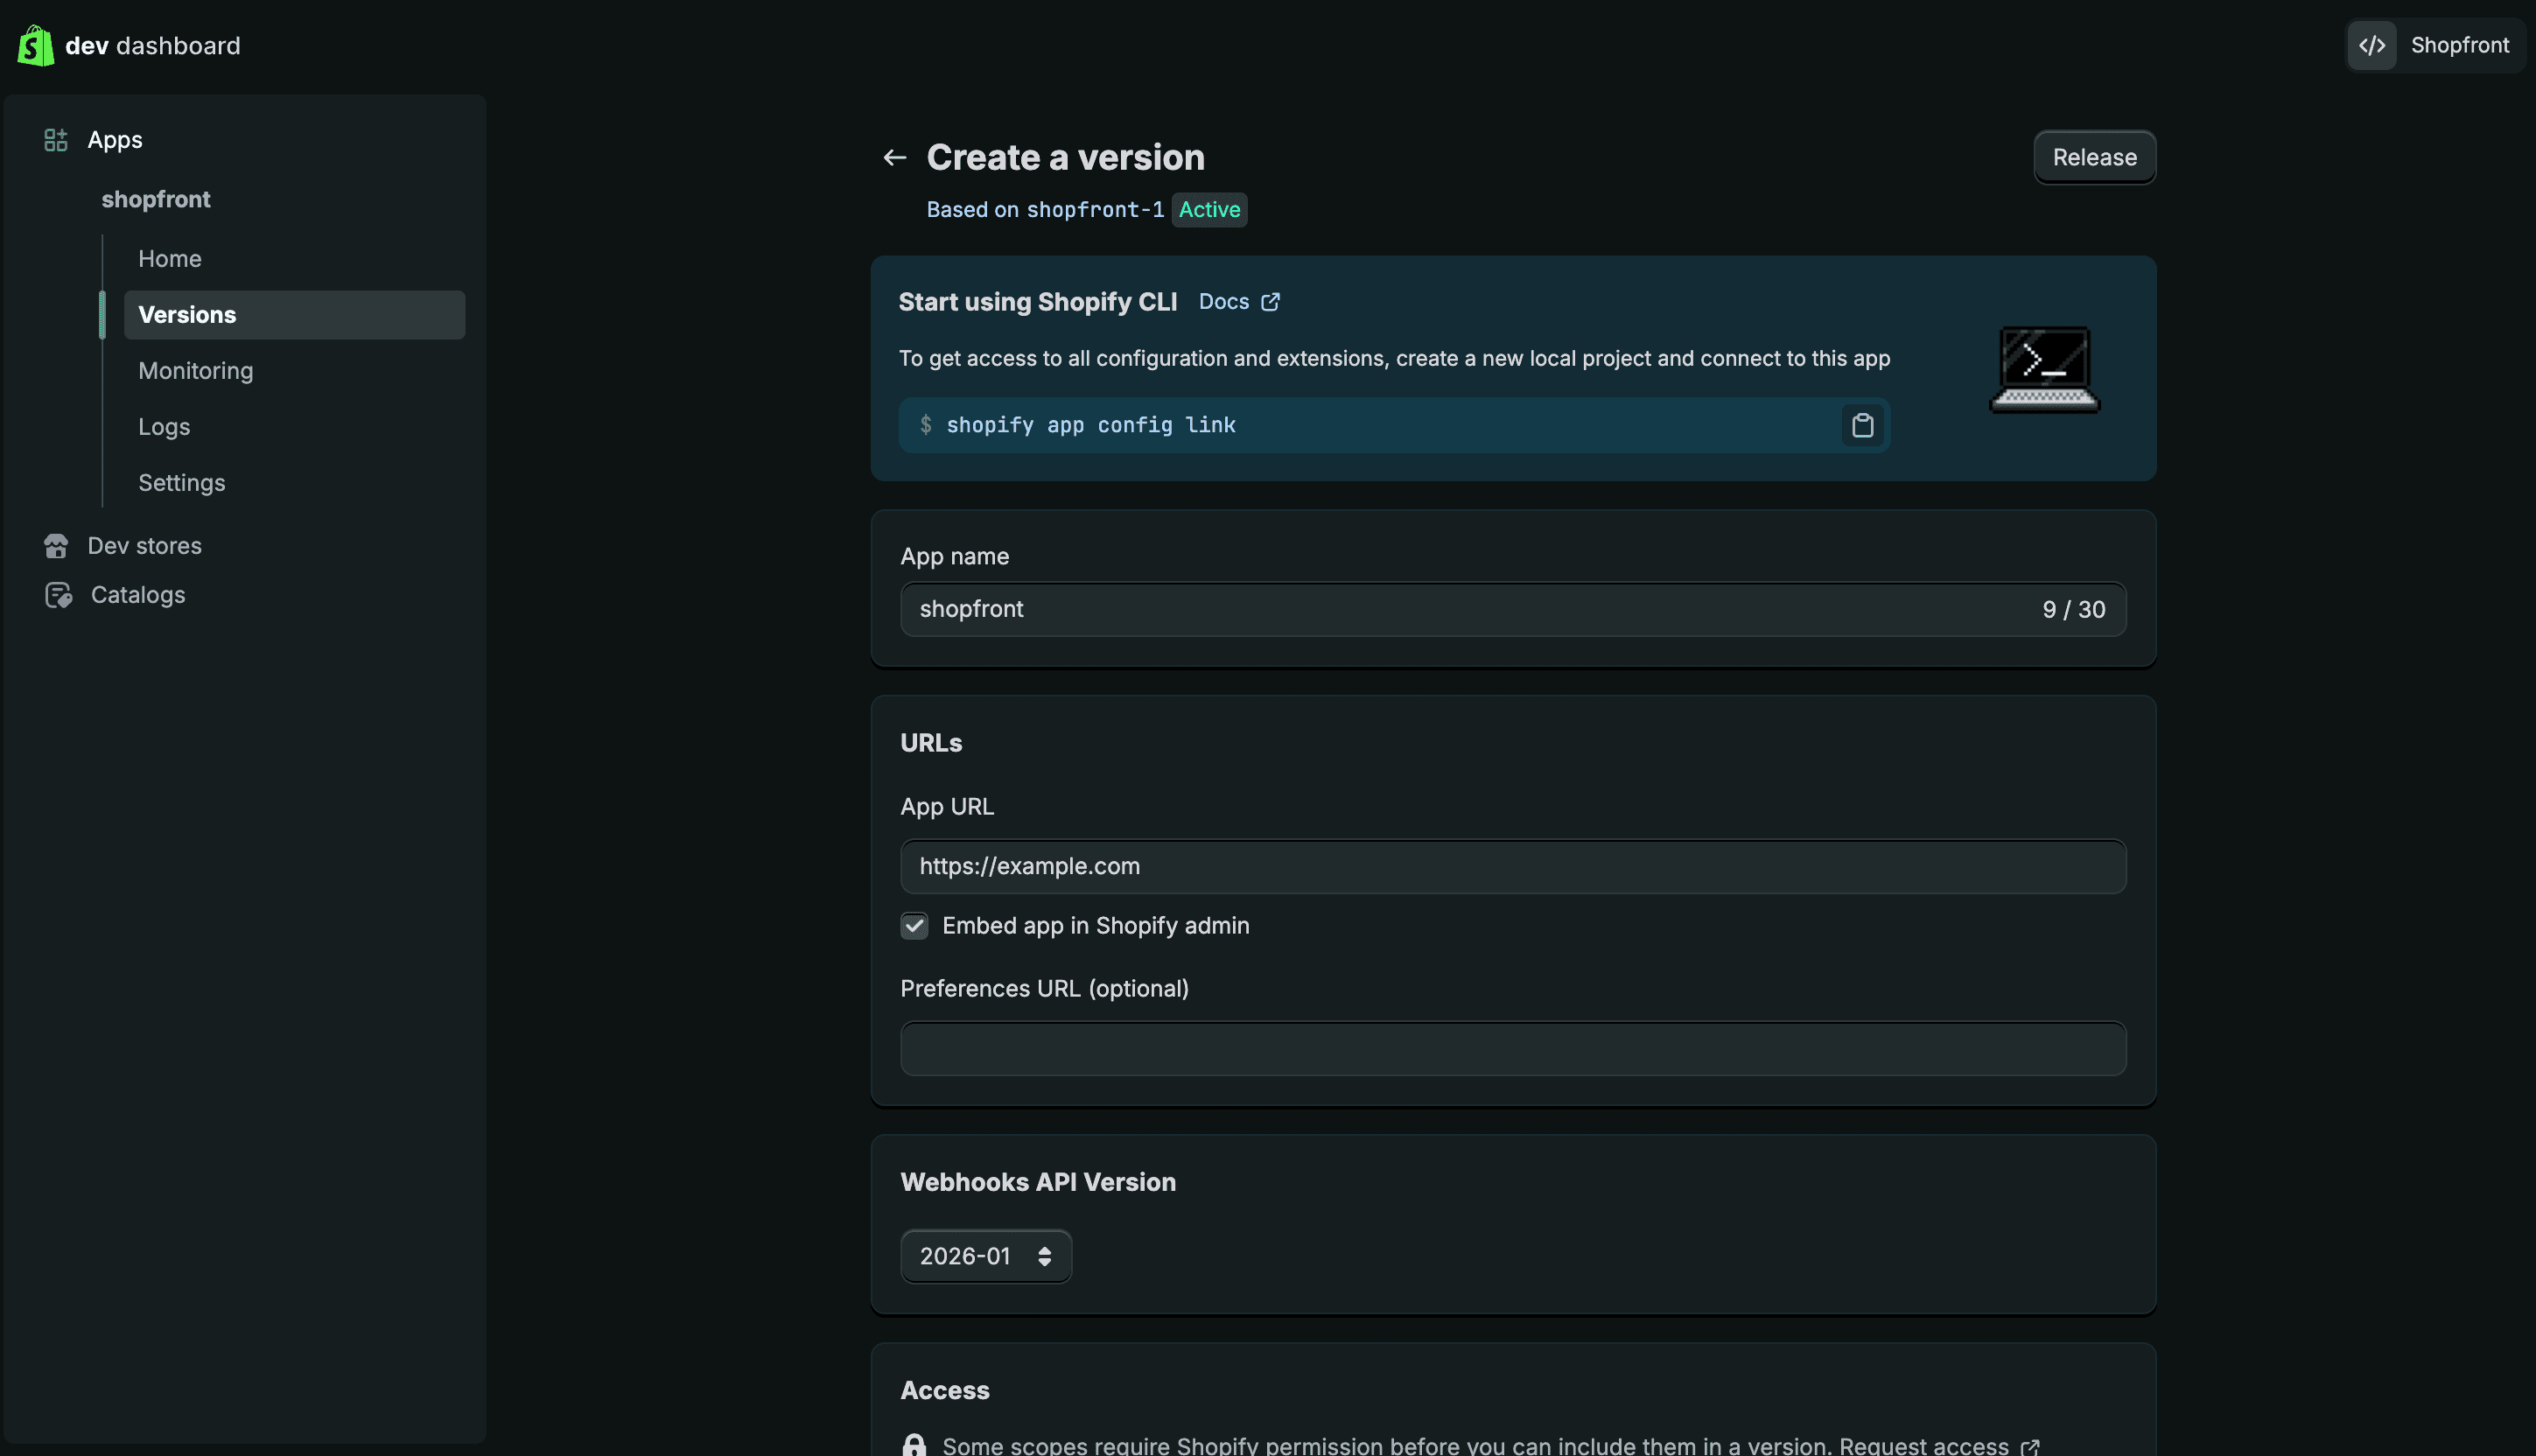
Configure Scopes
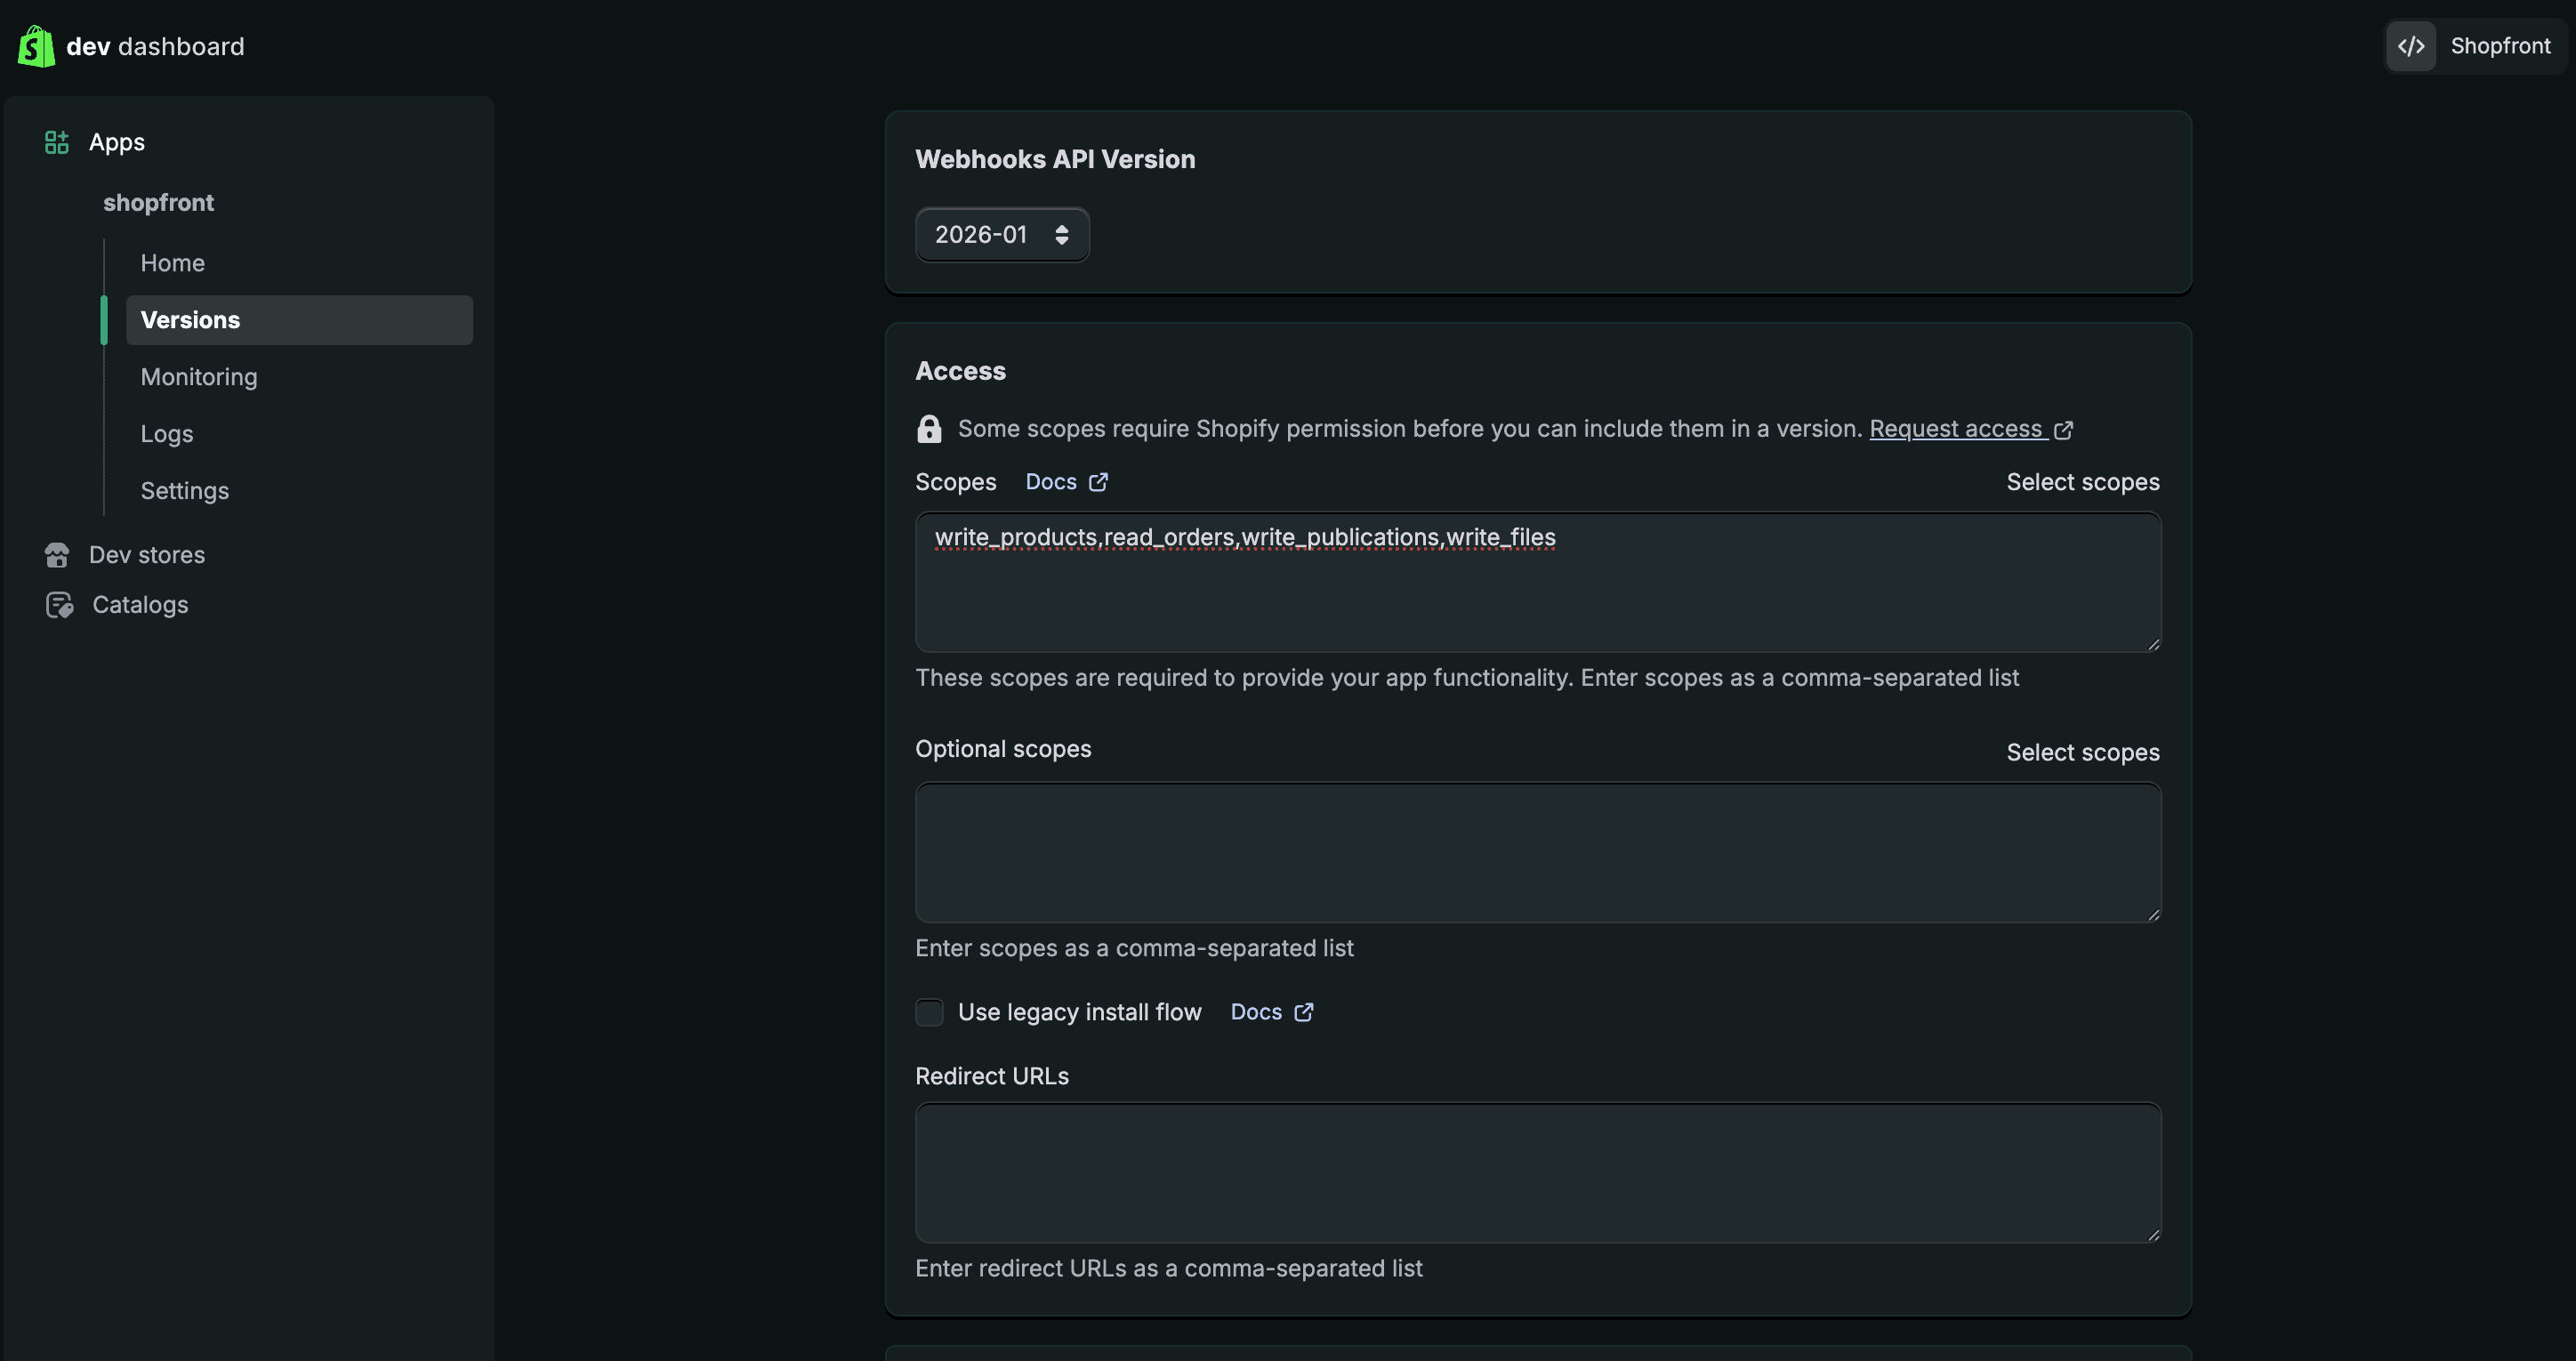
Scroll down to the Access section on the same page.
Use Select scopes to find and enable the following:
| Scope | Purpose |
|---|---|
write_products | Create and update products (includes metafield access) |
read_orders | Receive order webhooks for cross-channel delisting |
write_publications | Read and restore product availability across sales channels |
write_files | Upload product images |
write_inventory | Track and update inventory levels |
read_metaobject_definitions | Read category attribute definitions |
write_metaobject_definitions | Create category attribute definitions |
read_metaobjects | Read category attribute values |
write_metaobjects | Create category attribute values |
Or paste directly into the Scopes field:
write_products,read_orders,write_publications,write_files,write_inventory,read_metaobject_definitions,write_metaobject_definitions,read_metaobjects,write_metaobjectswrite scopes automatically include the corresponding read scope, so you don't need to add read_products separately.
Click Release at the bottom of the page.
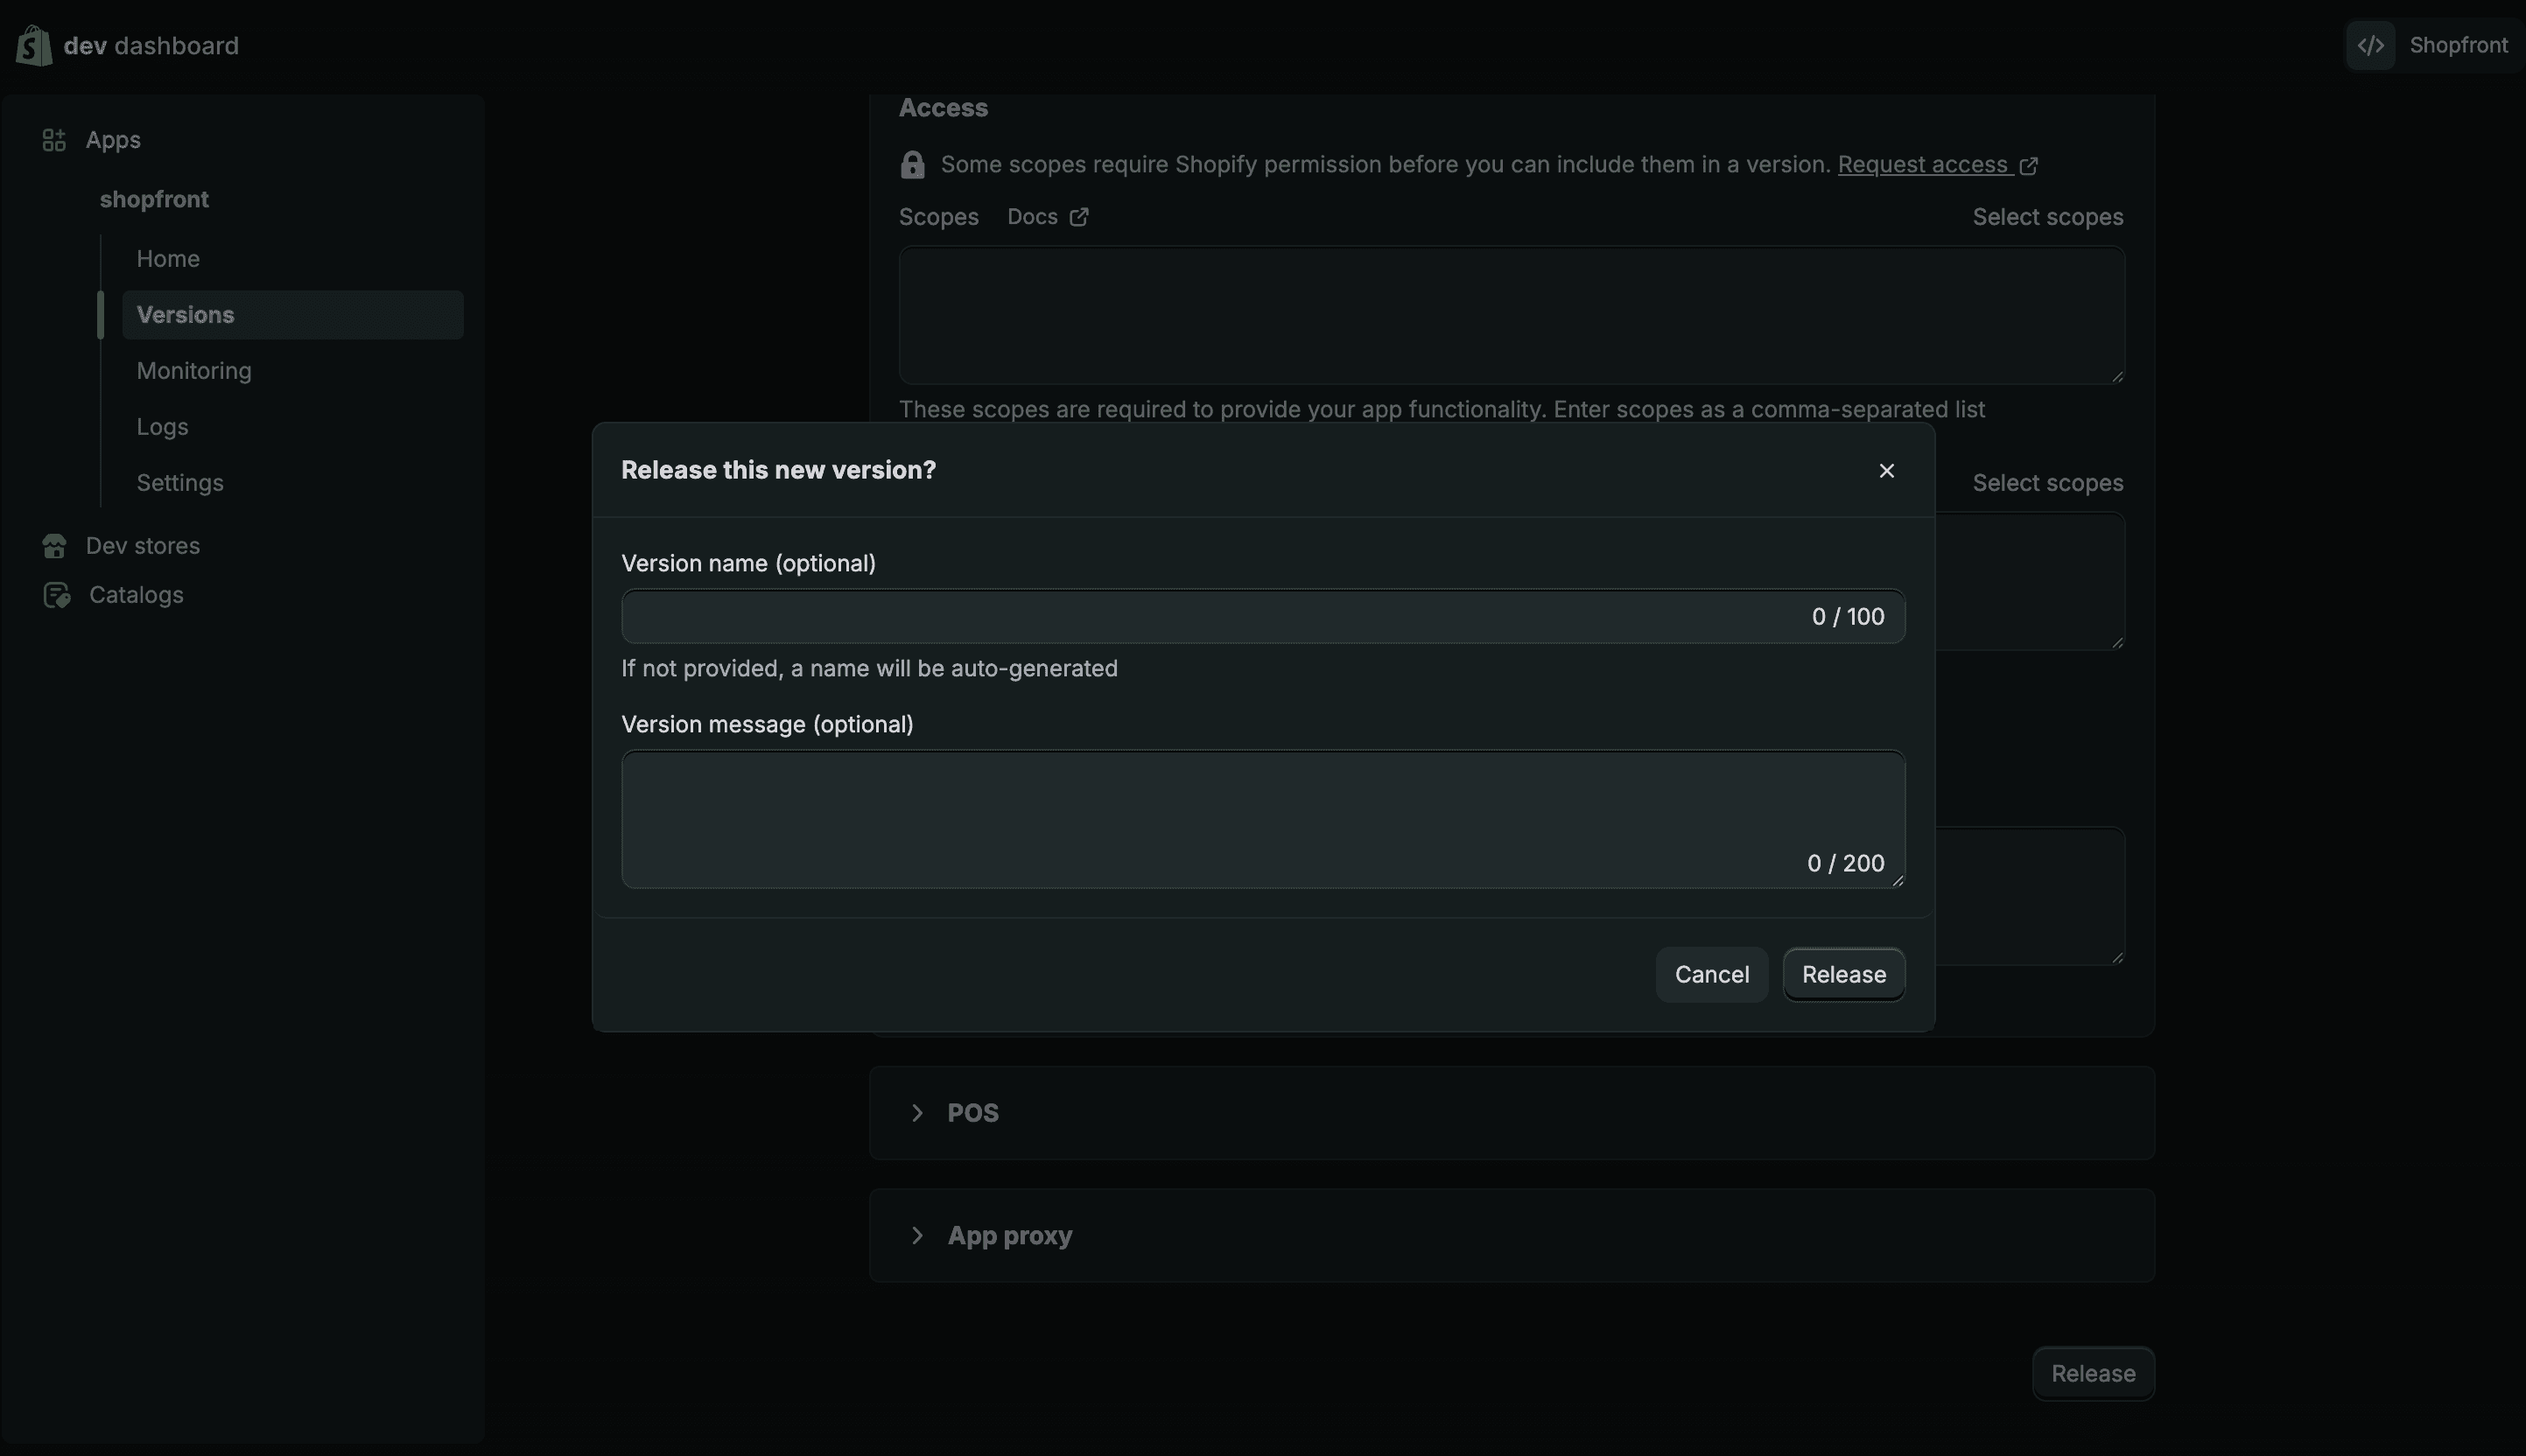
Click Release again in the confirmation dialog. You can leave the version name and message blank.
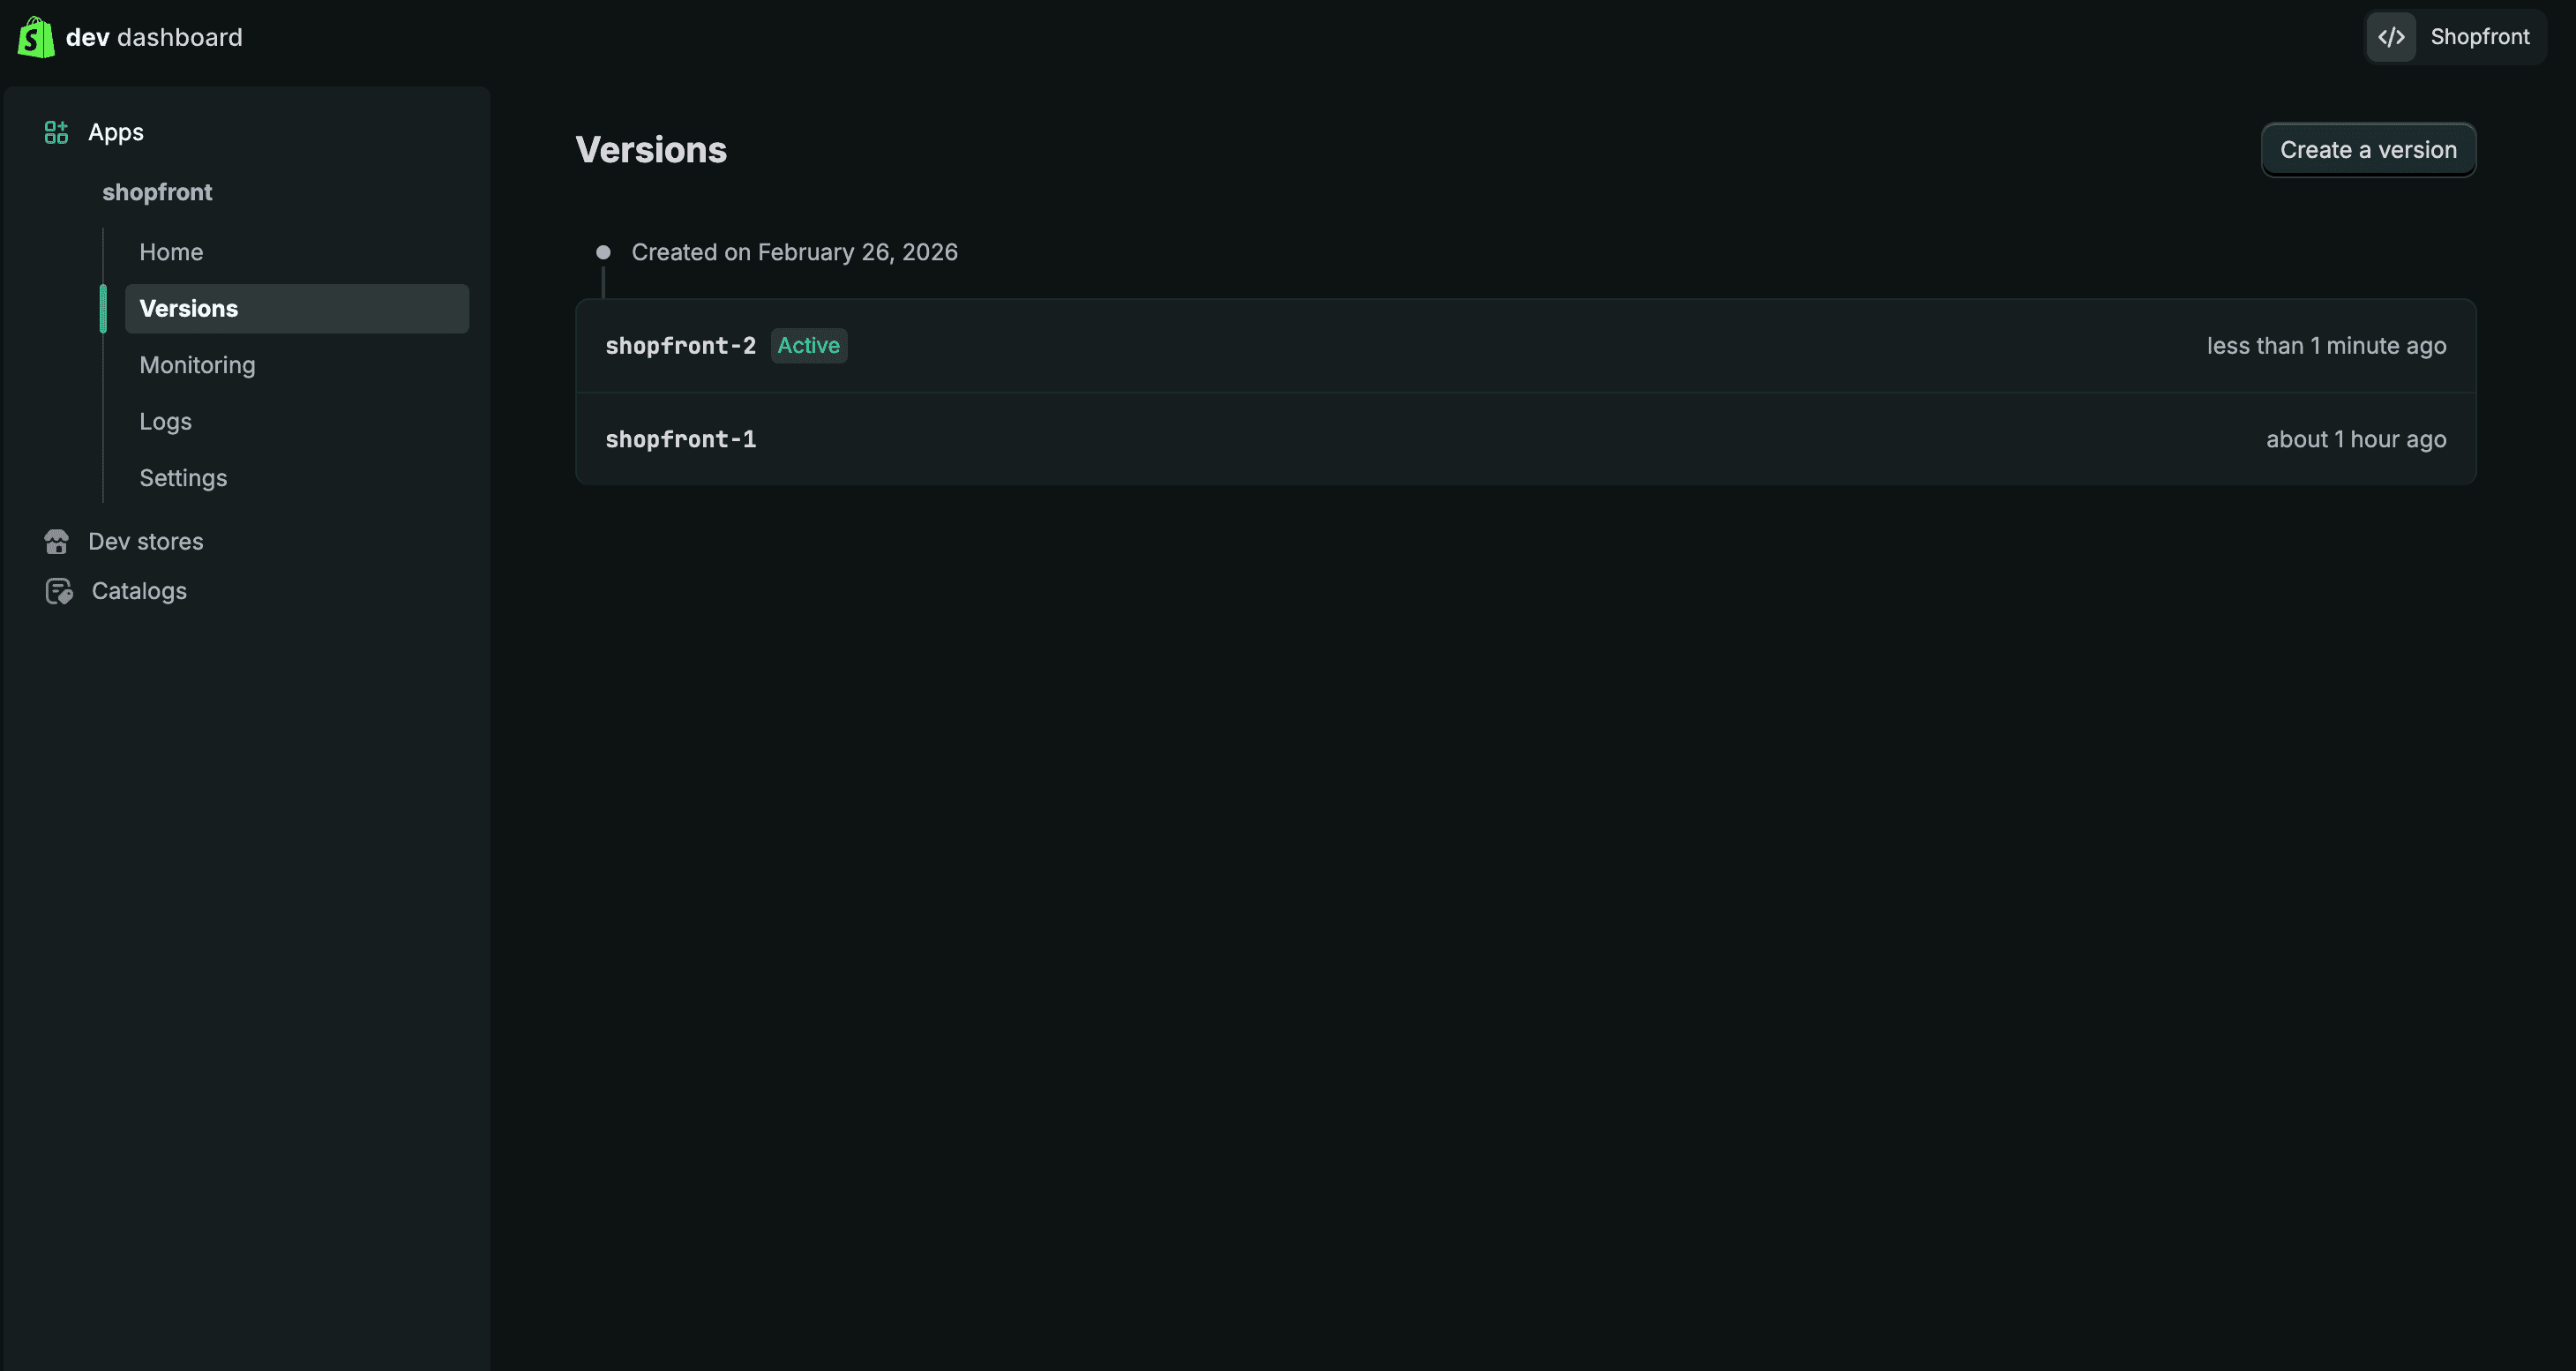
You'll be taken to the Versions page showing your active release.
Get Credentials
- Click Home in the left sidebar
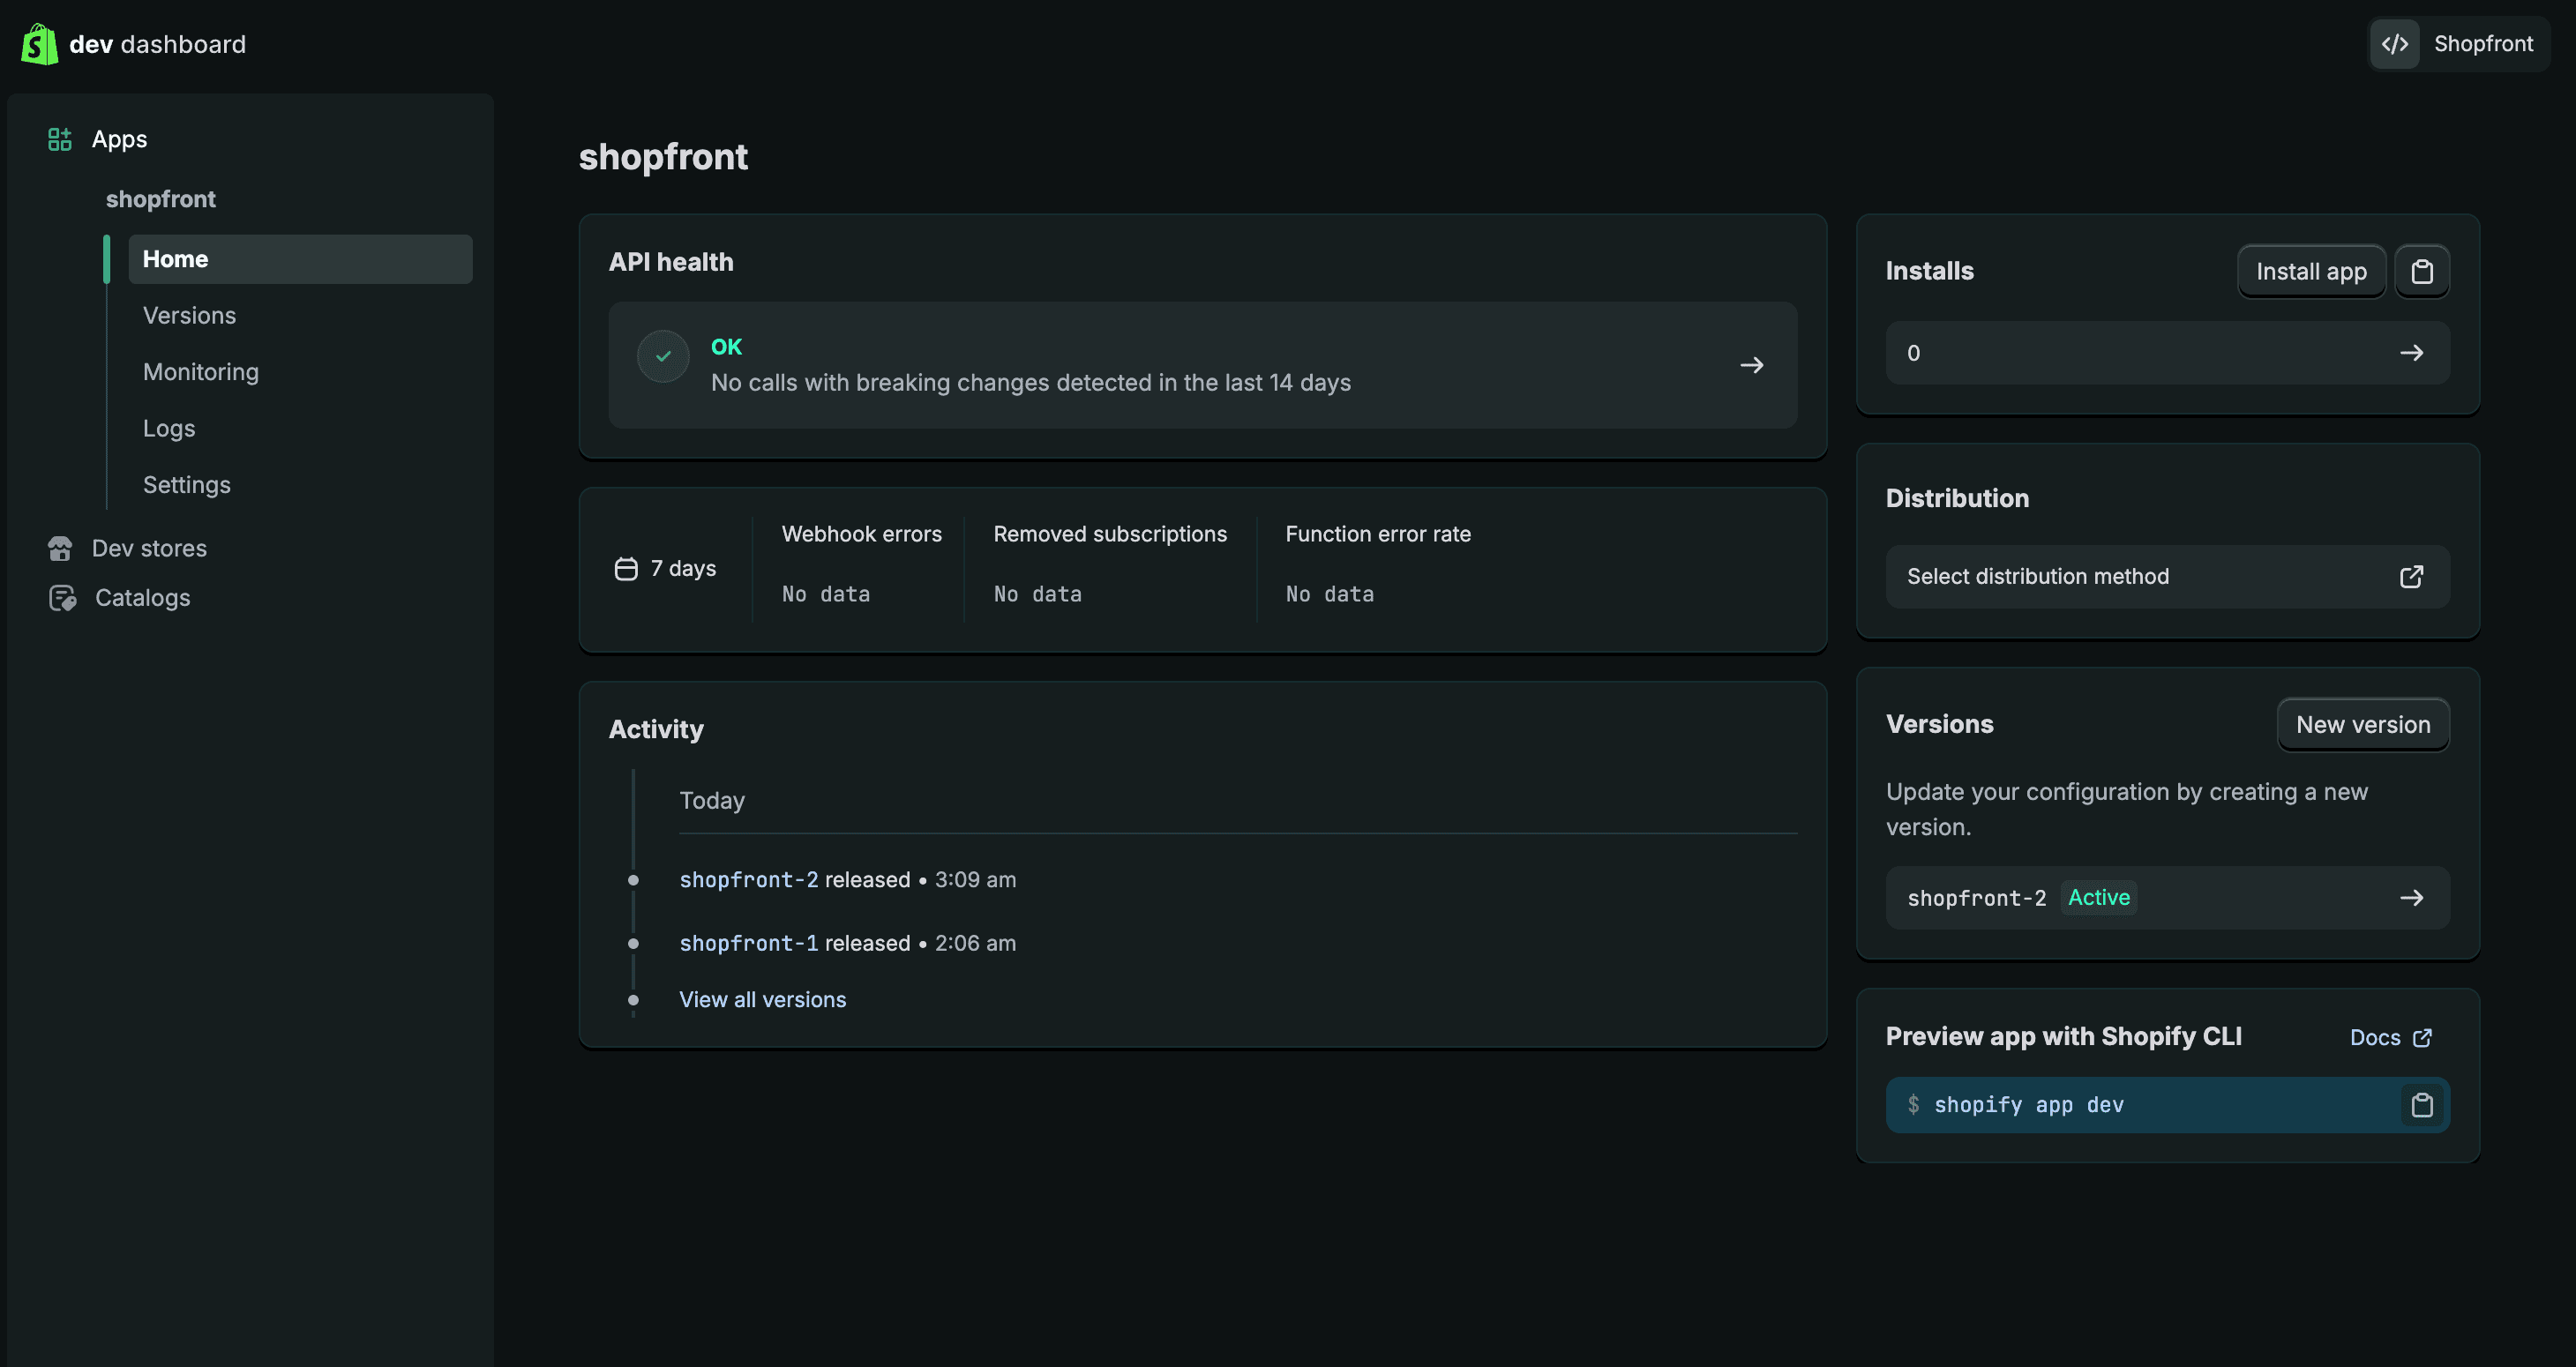
- Click Install app in the top-right corner
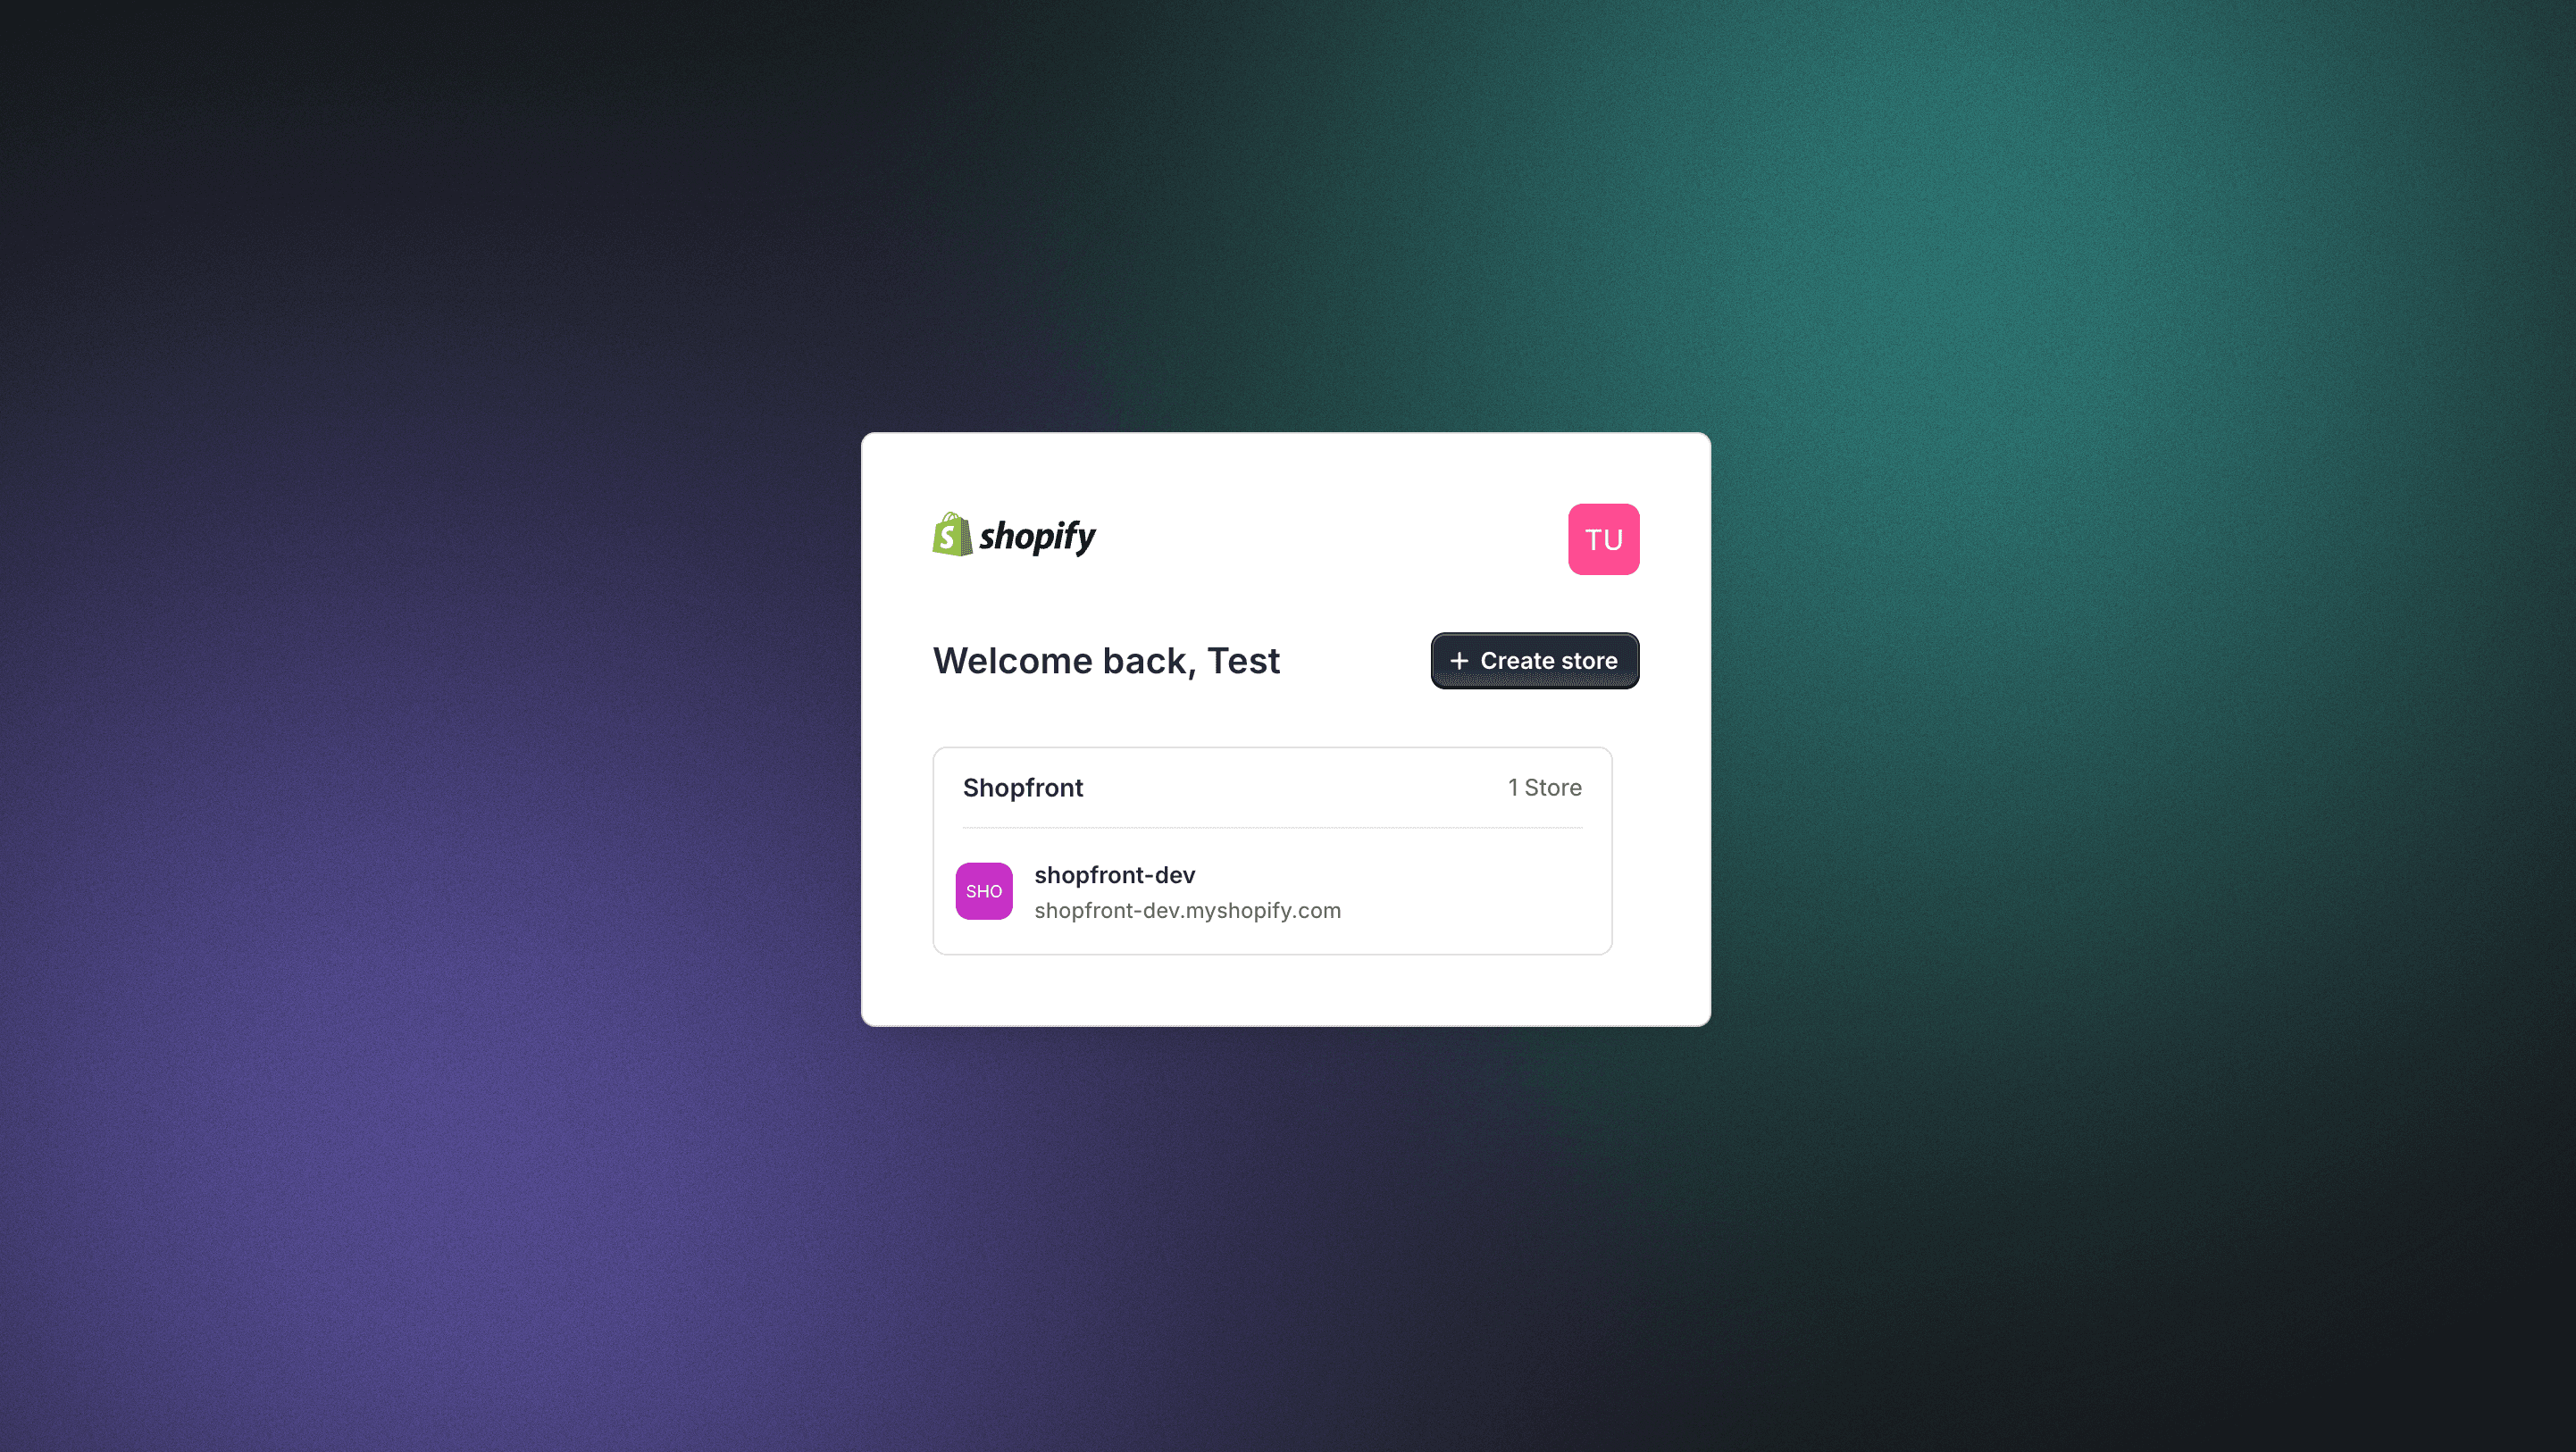
- Select your store to install the app
This will take you back to your Shopify admin page. The app is now installed and will appear under Apps in the sidebar.
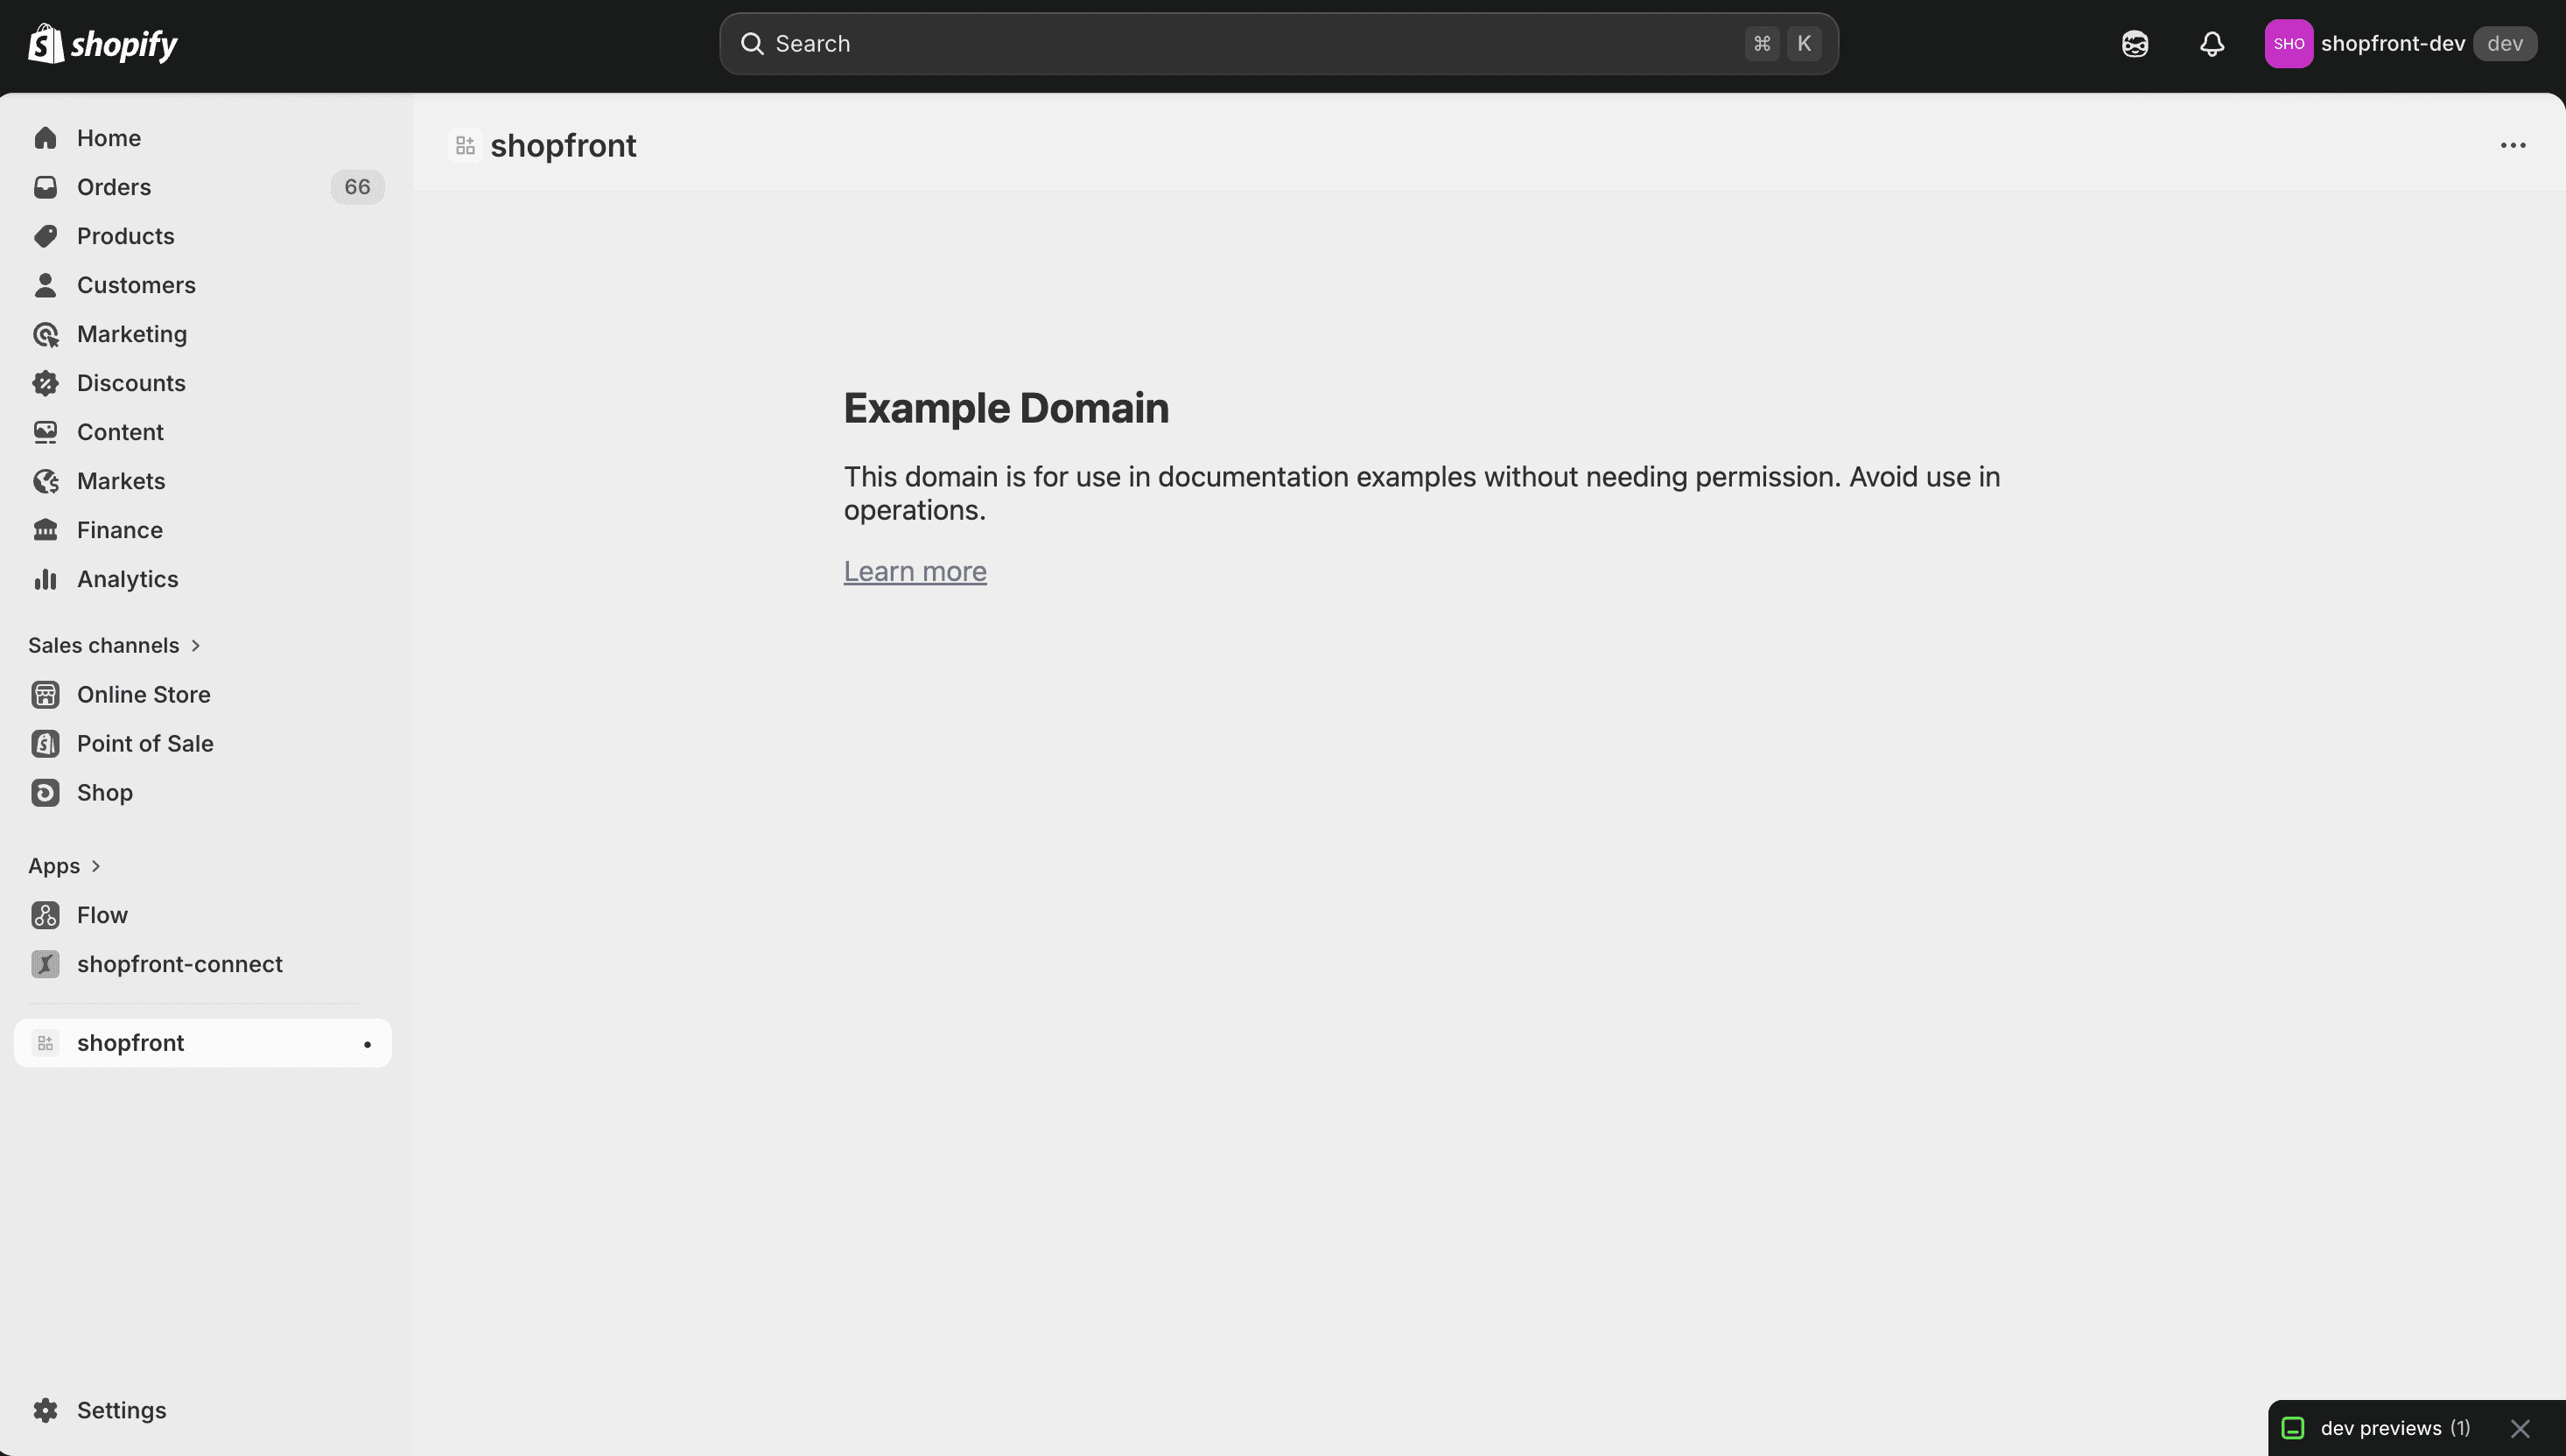
- Go back to the Dev Dashboard: Settings → Apps → Develop apps → Build apps in Dev Dashboard

- Click into your app
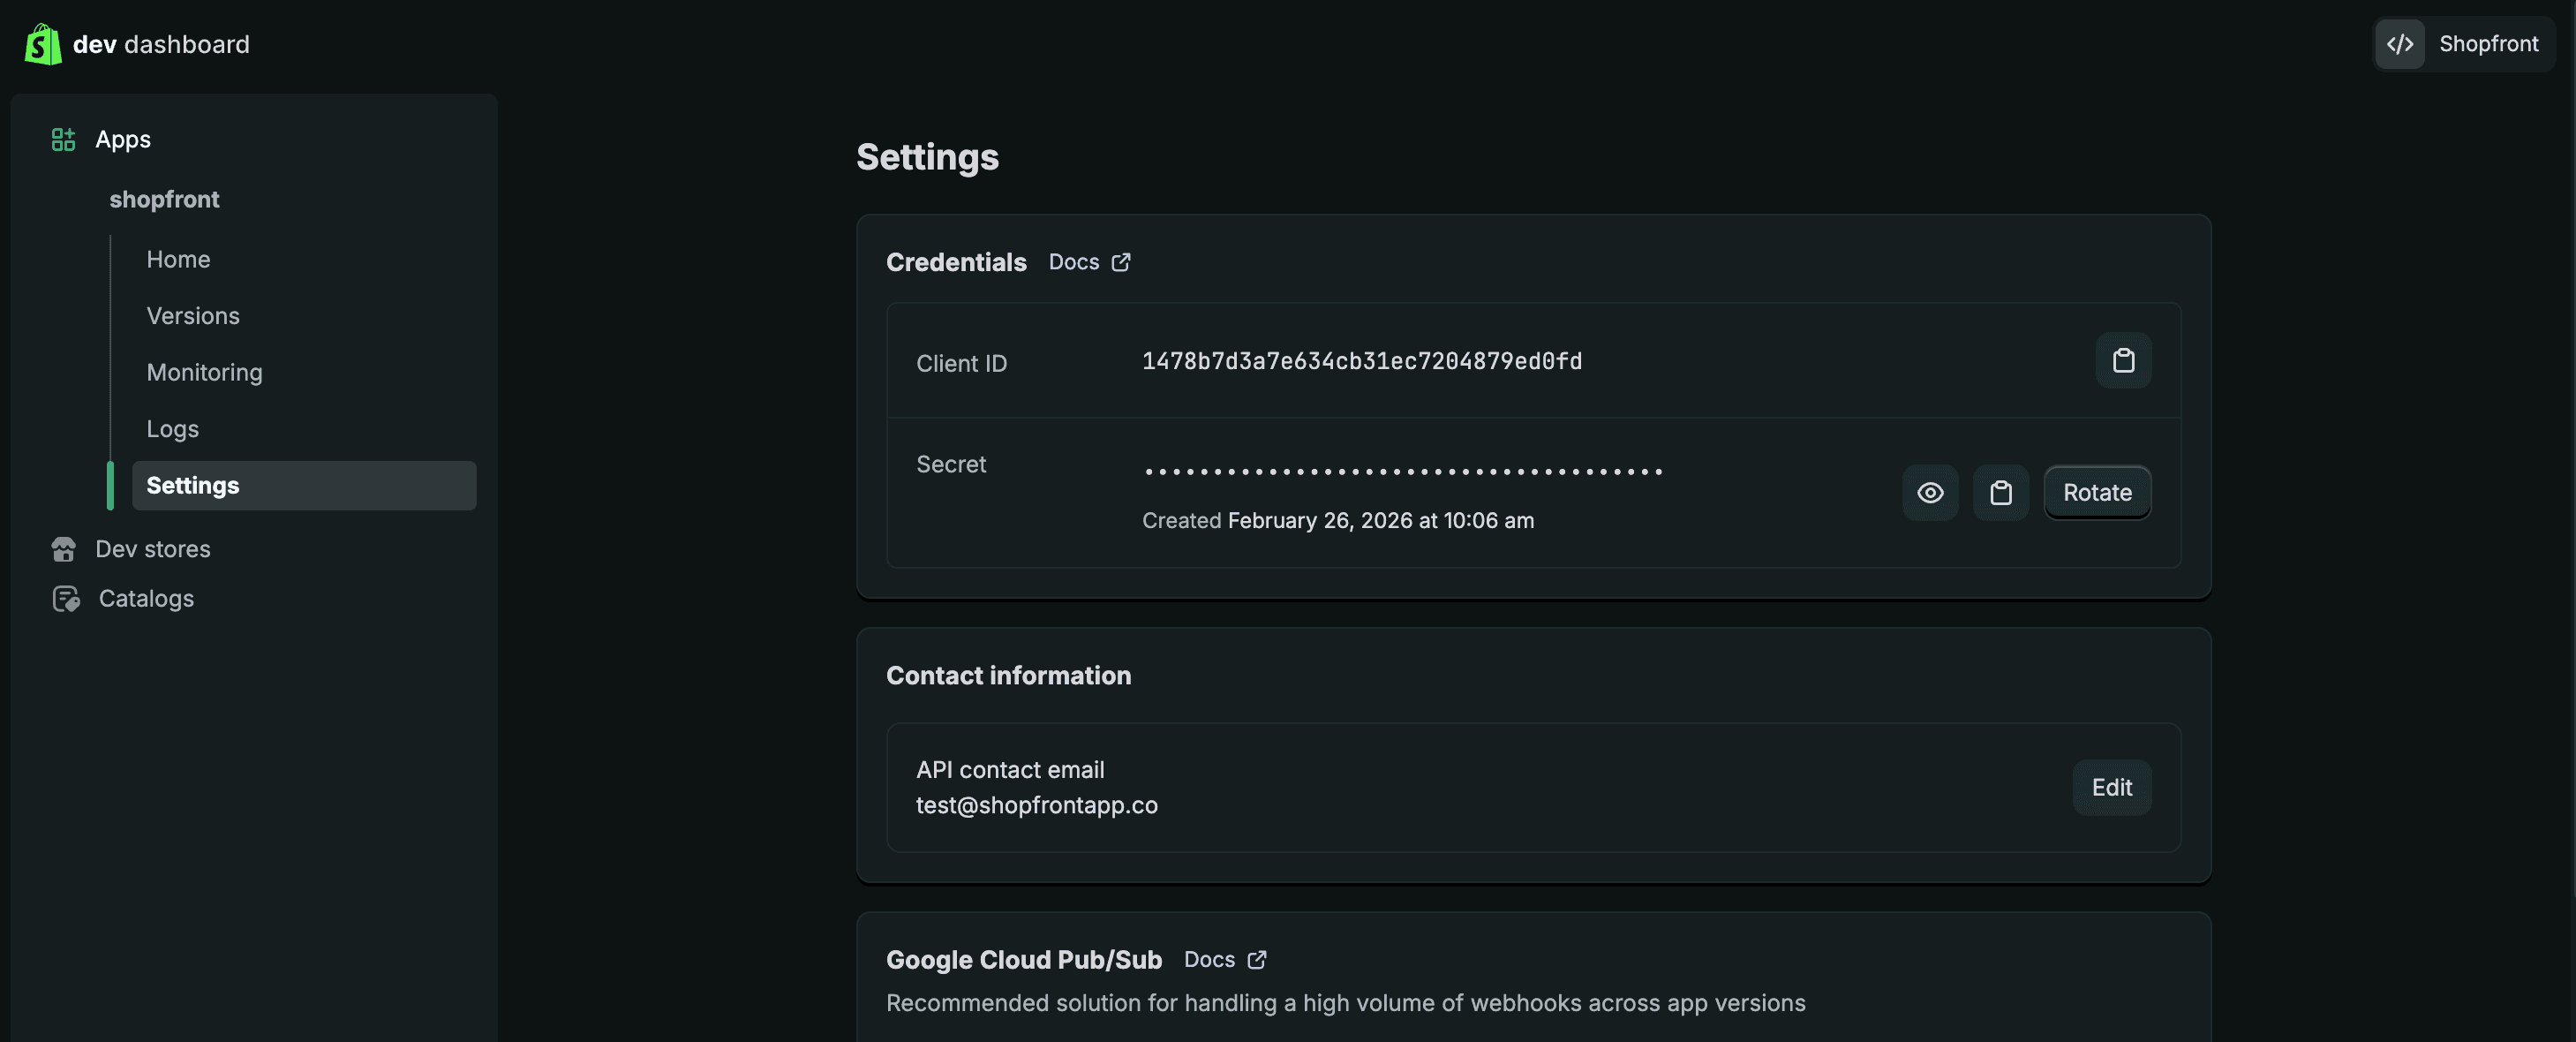
- Click Settings in the left sidebar
- Copy the Client ID and Client Secret using the clipboard buttons on the right
Connect to Shopfront
- Go to Settings → Connected Channels in Shopfront
- Click Connect on Shopify
- Enter your store domain (e.g.,
my-shop.myshopify.com) - Paste your Client ID and Client Secret
- Click Test Connection then Save
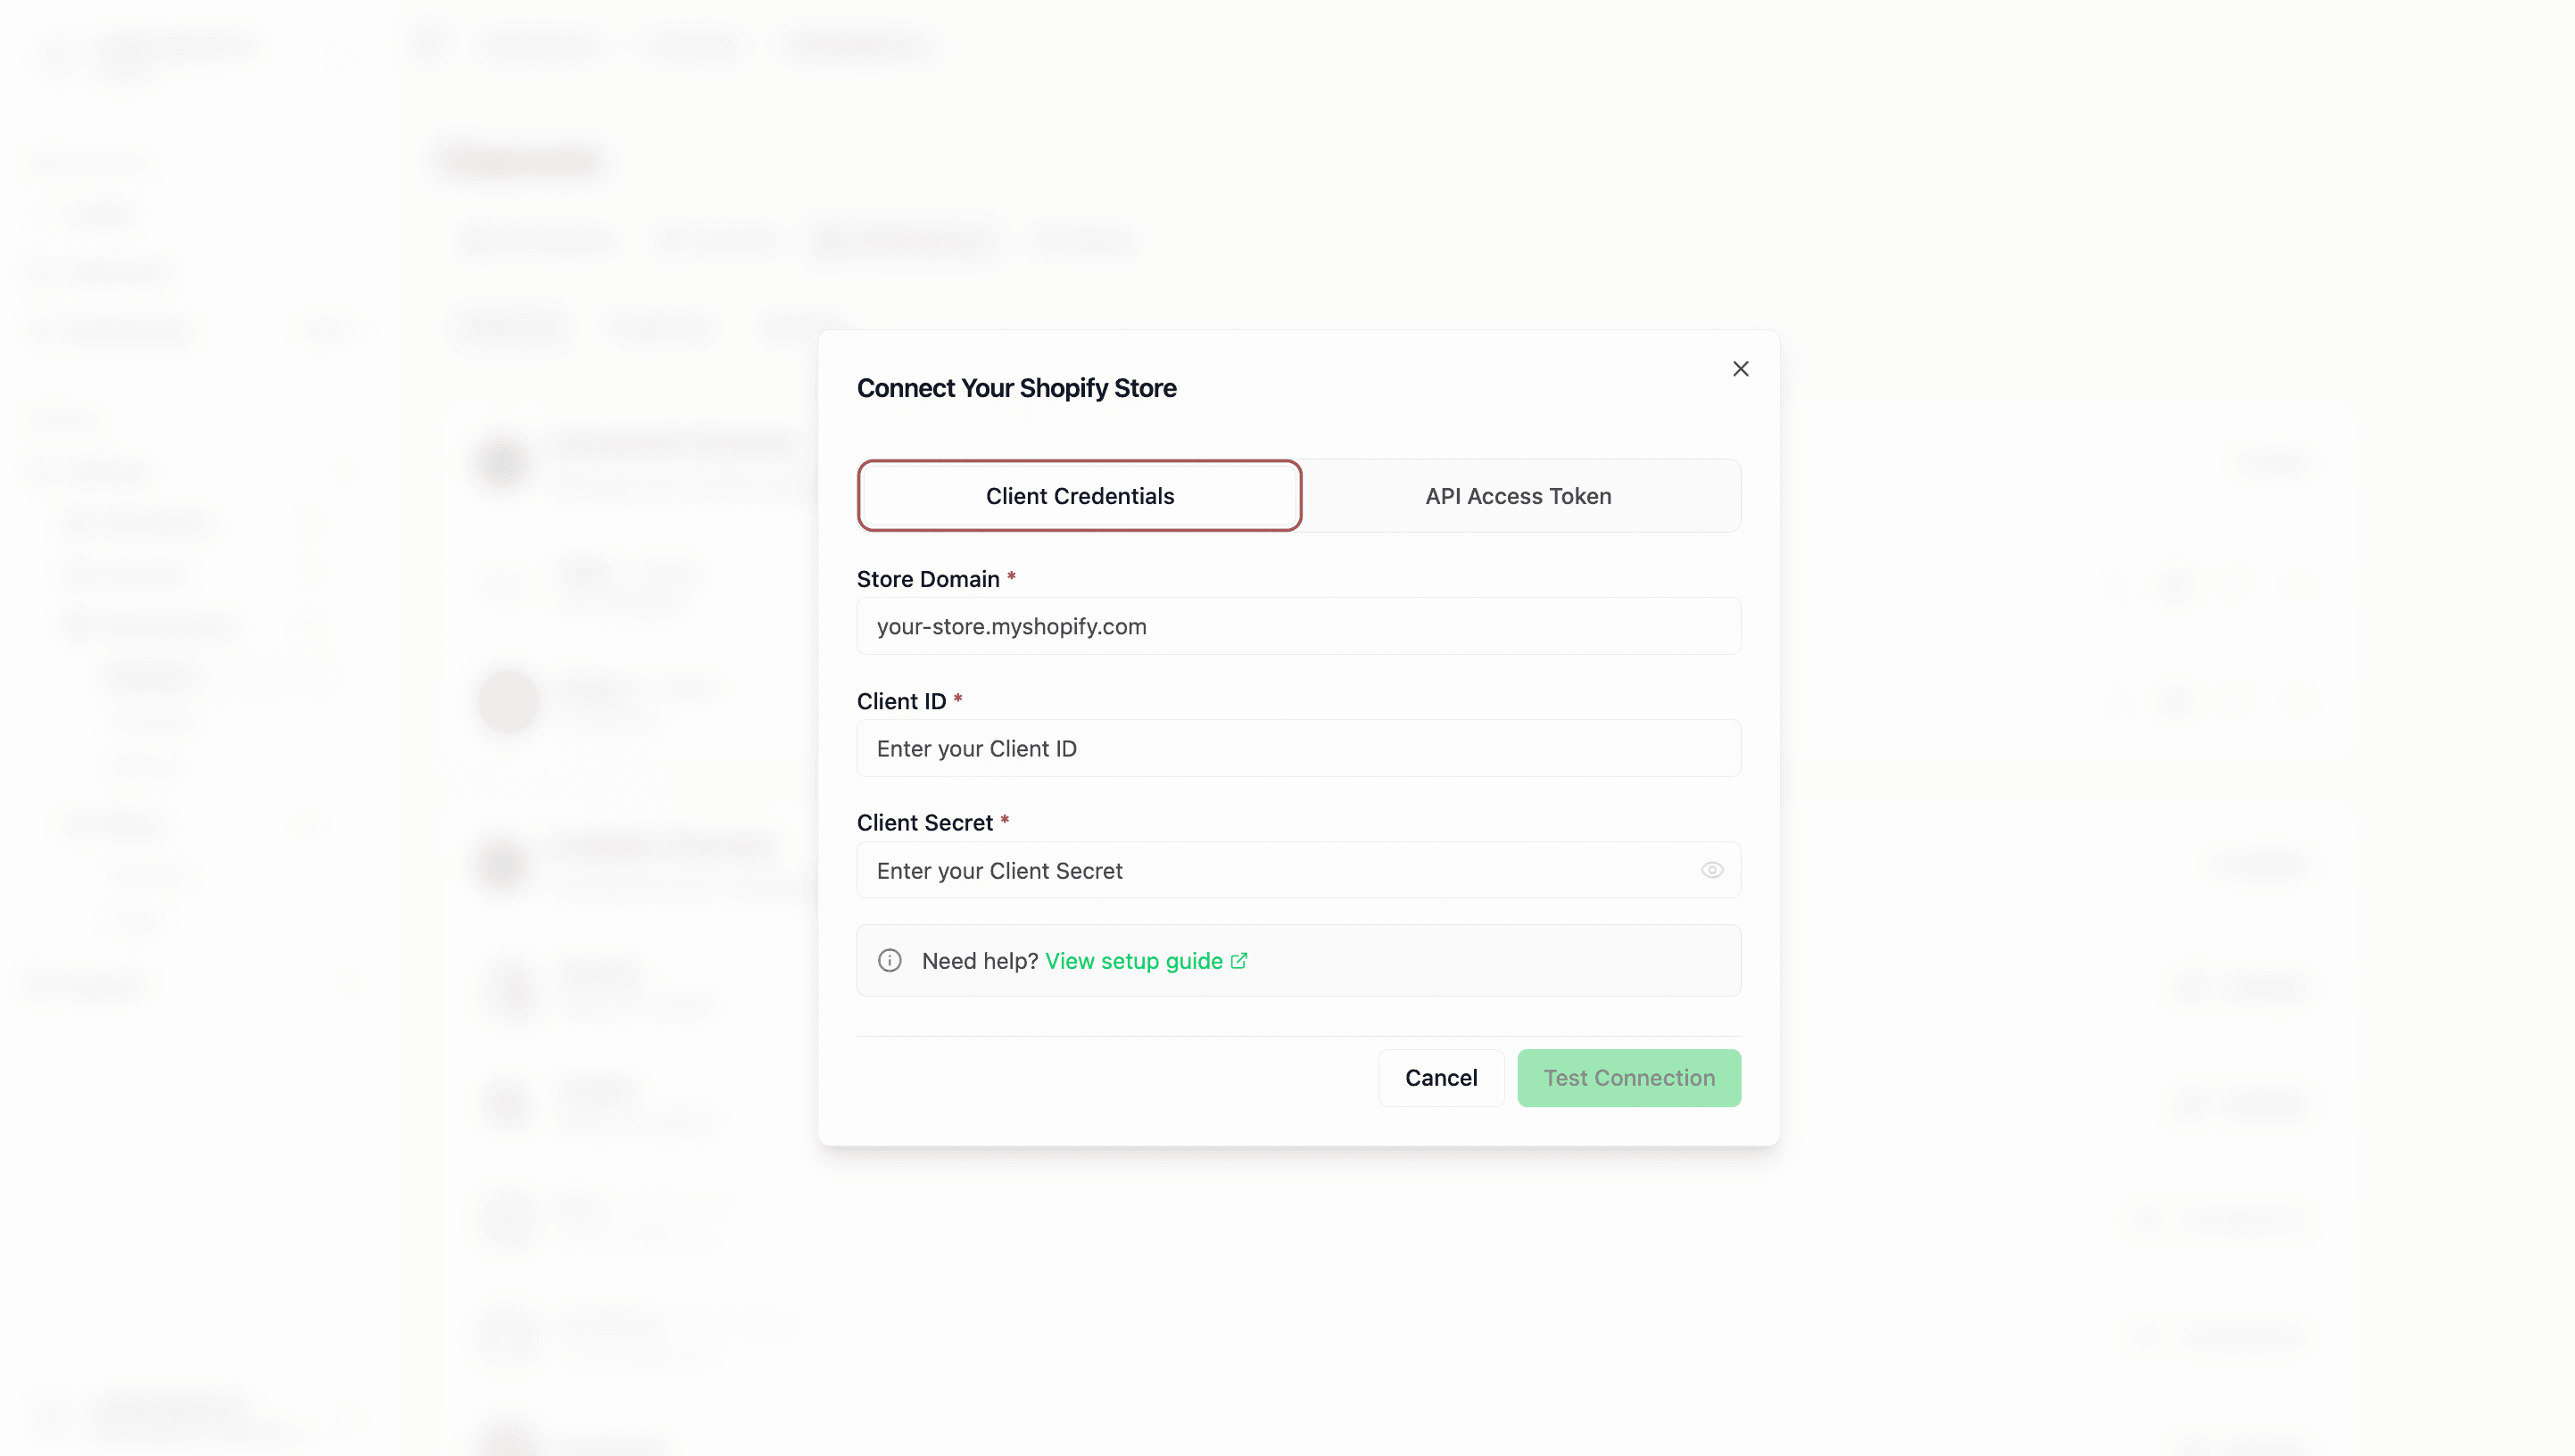
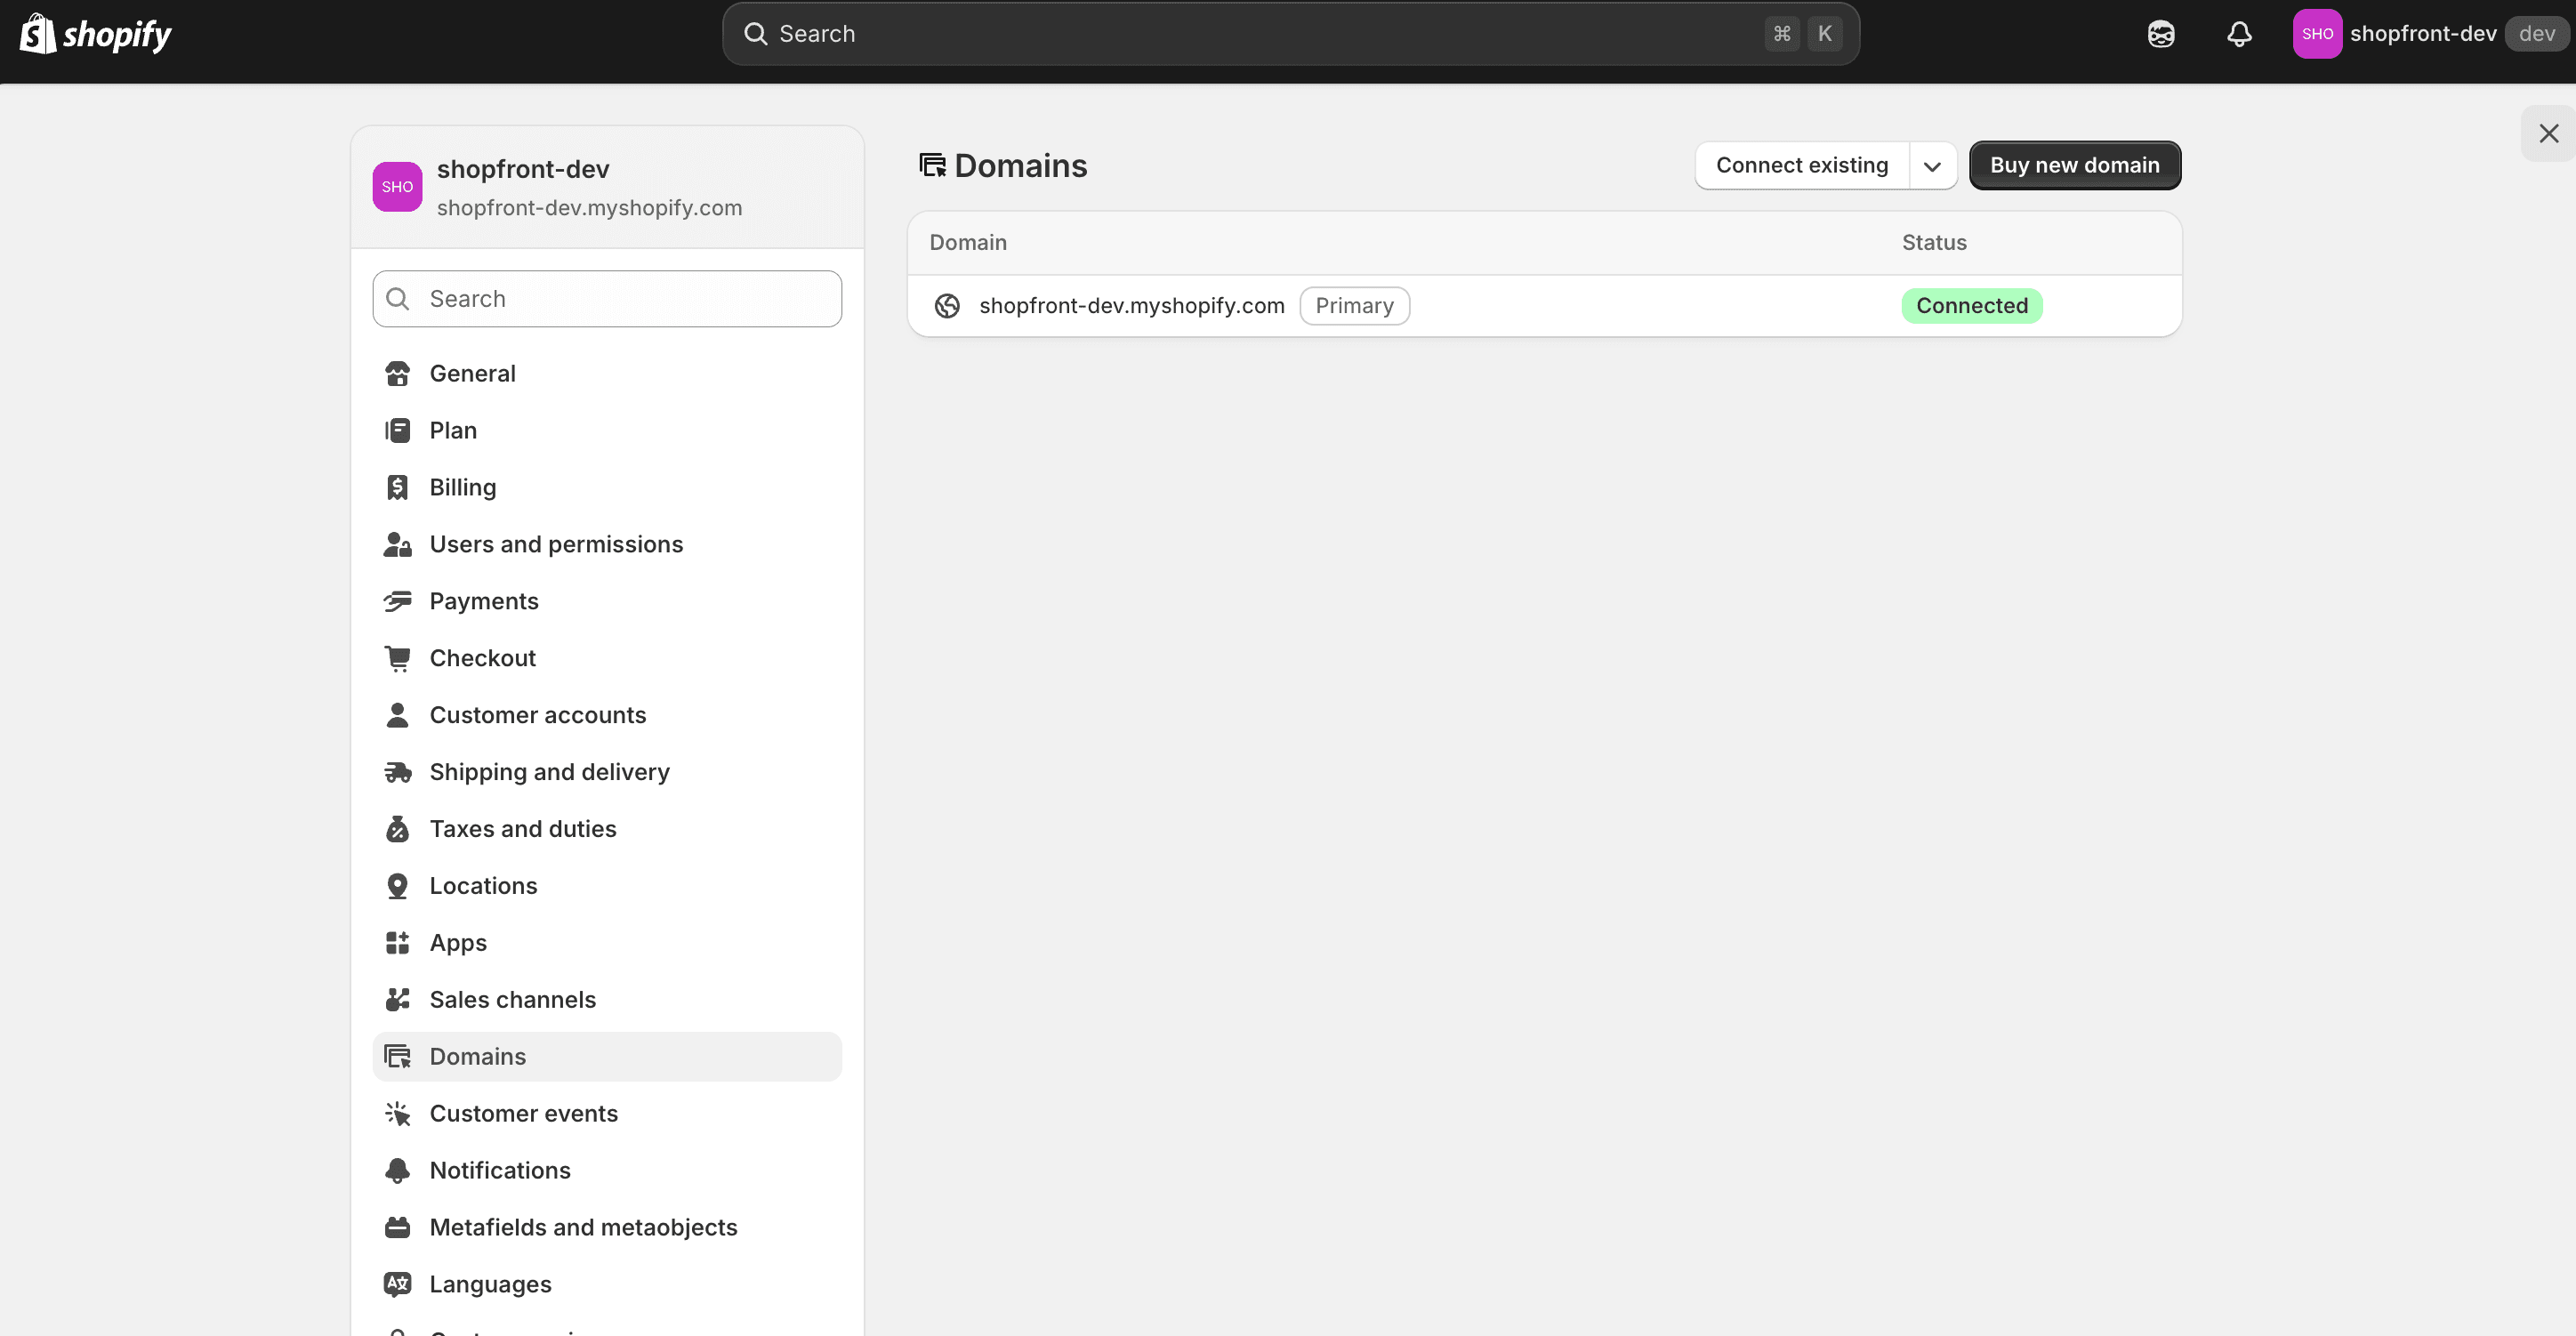
Your store domain is the .myshopify.com URL — not the Shopify admin URL. You can find it from your admin URL:
https://admin.shopify.com/store/my-shop/... → my-shop.myshopify.com
You can also find it under Settings → Domains in your Shopify admin.
How It Works
When someone buys on Shopify:
- Shopify sends a webhook to Shopfront instantly
- The order appears in your dashboard
- The item is delisted from your other connected channels (eBay, Depop, Grailed, and Vestiaire Collective)
When Shopfront delists a Shopify product, it archives the existing product. The product and its details remain in Shopify. Relisting restores its previous status and sales-channel settings when Shopfront has captured those settings and the item is eligible for sale.
Update an Existing Connection
write_publications is required to read and restore sales-channel settings. It also includes read_publications; you do not need to add that scope separately. If your connection already has write_publications, no scope change is needed.
If Shopfront reports missing publication access:
- Open your existing app in the Shopify Dev Dashboard and create a new version with
write_publicationsenabled under Access. - Release the version and approve the updated access for your store if prompted. For apps installed in your own organisation, Shopify approves the scope change when you release the version.
- Return to Settings → Connected Channels in Shopfront and reconnect the same Shopify store. Use Test Connection then Save to validate the permissions on the new connection.
For an existing app that uses a legacy API token, update its Admin API permissions in Shopify and follow Shopify's prompts to apply the change, then reconnect it in Shopfront.
An older connection without publication access can still archive products. If Shopfront could not capture a product's original sales-channel settings, reconnecting cannot recover those settings. Review and restore that product directly in Shopify only if it is eligible for sale, checking its status and sales channels. Shopfront will block automatic relisting for that removal. Sold stock must remain unavailable.
Troubleshooting
| Problem | Solution |
|---|---|
| Connection failed | Check domain format (store-name.myshopify.com) and credentials |
"Access denied" or missing write_publications | Follow Update an Existing Connection above, then retry |
| Original sales-channel settings could not be captured | Review the product directly in Shopify; reconnecting cannot recover its original settings |
| Orders not syncing | Verify read_orders scope is enabled |
| Lost Client Secret | Go to API credentials tab and click Show |
If you add scopes after connecting, you'll need to reconnect in Shopfront for changes to take effect.
Need help? contact@shopfront.app